
Getting Started with Medical Image Sharing
Below are a few tips to get started
IMPORTANT – For security purposes, new account email addresses must be verified to enable certain features. To do this, simply login to your account and follow the prompt located at the bottom left corner of your dashboard.

TO REQUEST IMAGES
STEP 1
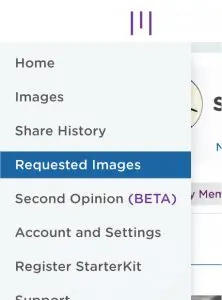
TO REQUEST IMAGES –
from patients, select “Requested Images” from the drop-down menu located at the top left corner of your dashboard (home screen).
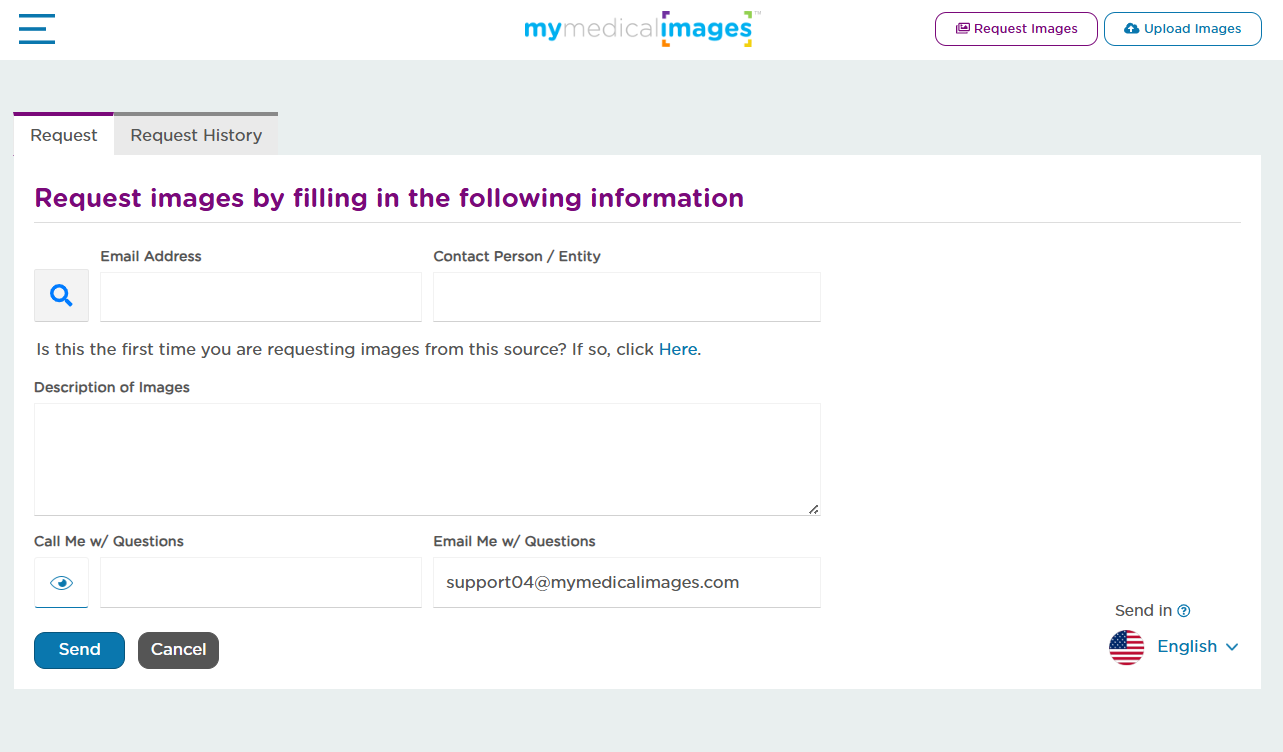
STEP 2
Input the patient’s email and name. Patients will be able to upload images at no cost and will receive a Free Basic Account.
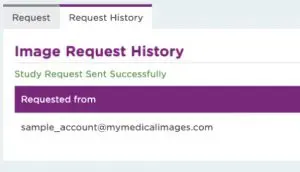
STEP 3
Once images have been received, an email notification will be sent. The status of requested images can be found on the “Request History” table.
TO DOWNLOAD IMAGES

STEP 1
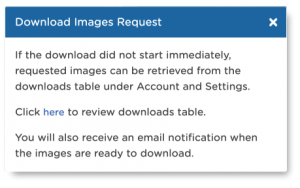
Select “Download Images” from the menu located at the top right corner of a study
on the dashboard or select the icon anywhere it is displayed.A pop-up message will
be displayed at the bottom left corner of your screen with a “click here” link
to the downloads page.
STEP 2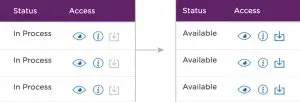
On the downloads page, a zip file with the images will be
available once the download icon turns blue. Large studies
may take a few minutes, an email notification will be sent when the download is ready.
+ Note
Apple Safari users need to have the automatically open option turned off.
STEP 3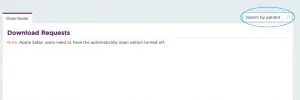
Use the “Search Bar” to find studies by the patient name or other
common DICOM tag.
TO SHARE IMAGES
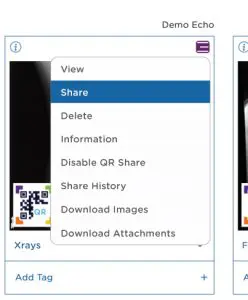
Select “Share” from the menu located at the top right corner of a study on the dashboard or anywhere the icon is displayed. Images can be shared with colleagues and patients, with or without a mymedicalimages® account.
Recipients without a mymedicalimages® account
will have view-only access.
Getting Started with Medical Image Sharing
Below are a few tips to get started.
IMPORTANT – For security purposes, new account email addresses must be verified to enable certain features. To do this, simply login to your account and follow the prompt located at the bottom left corner of your dashboard.
TO REQUEST IMAGES
STEP 1
TO REQUEST IMAGES from patients, select “Requested Images” from the drop-down menu located at the top left corner of your dashboard (home screen).

STEP 2
Input the patient’s email and name. Patients will be able to upload images at no cost and will receive a Free Basic Account.

STEP 3
Once images have been received, an email notification will be sent. The status of requested images can be found on the “Request History” table.

TO DOWNLOAD IMAGES
STEP 1
Select “Download Images” from the menu located at the top right corner of a study on the dashboard or select the icon anywhere it is displayed. A pop-up message will be displayed at the bottom left corner of your screen with a “click here” link to the downloads page.


STEP 2
On the downloads page, a zip file with the images will be available once the download icon turns blue. Large studies may take a few minutes, an email notification will be sent when the download is ready.

+ Note
Apple Safari users need to have the automatically open option turned off.
STEP 3
Use the “Search Bar” to find studies by the patient name or other common DICOM tag.

TO SHARE IMAGES
Select “Share” from the menu located at the top right corner of a study on the dashboard or anywhere the icon is displayed. Images can be shared with colleagues and patients, with or without a mymedicalimages® account. Recipients without a mymedicalimages® account will have view-only access.

WEBPAGE UPLOADER

An example of the mymedicalimages® “Uploader Button” can be seen on
https://miamispine.com.
The Uploader Button can be added to a website to allow patients to upload images directly to a physician’s account at no cost and receiving a free basic account.

For more information , contact us at uploader@mymedicalimages.com. Or to schedule a brief demo, contact us at demo@mymedicalimages.com.