
Accessing your Share History
Step 1: Log-in to your mymedicalimages account at https://app.mymedicalimages.com/.
Step 2: Click on the Main Menu icon in the top left-hand corner of the screen, then select the “Share History” option.

This will take you to the Shared History page. This page has three tabs to organize your images labeled as “Shared w/Me”, “I Shared”, and “Received from Physician”. When you first navigate to the Shared History page, you will land on the “I Shared” tab.
Below is a brief summary of the three tabs, as well as a description of the functions in each.
I Shared
The “I Shared” tab will have a table show each of the studies you have shared with other people.
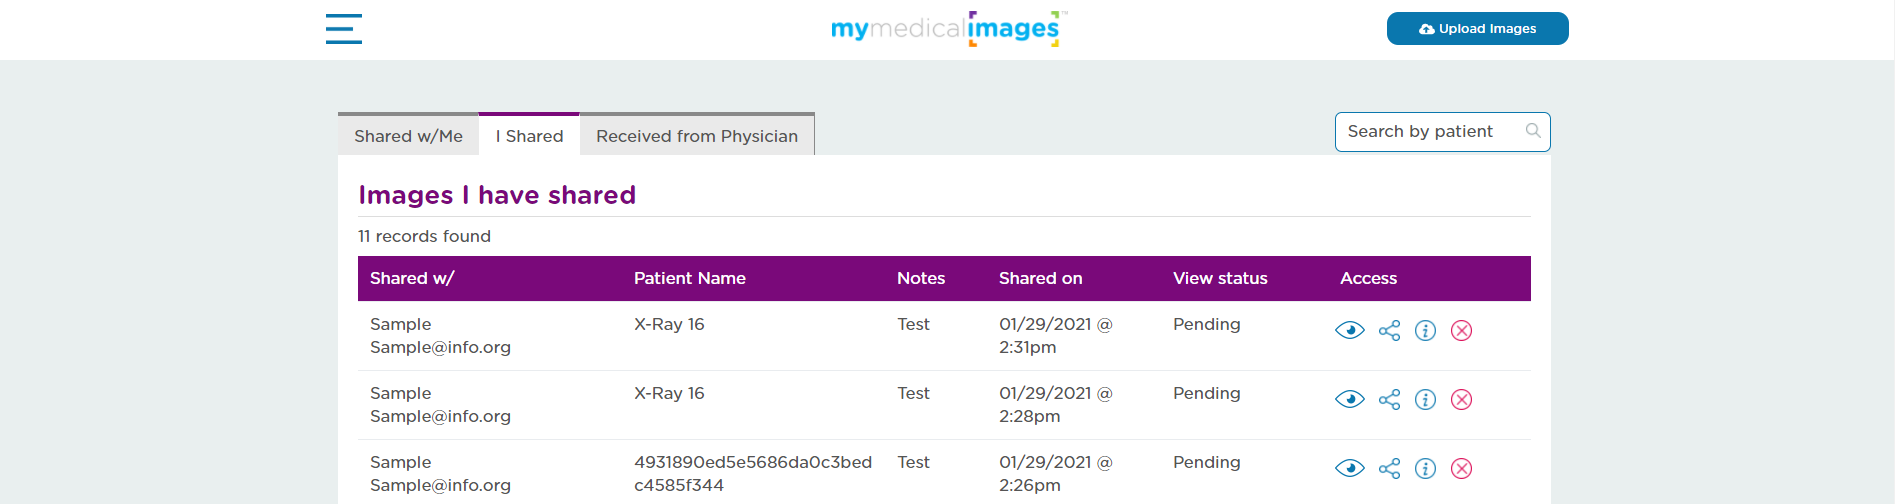
There are six sections of the table containing details related to the share.
1. Shared w/
This section contains the name and email address of the person the study was shared to.
2. Patient Name
This section details the name of the patient as it appears in the study.
3. Notes
This section will show the description you gave when you shared the image.
4. Shared on
This section will give the time and date the study was shared.
5. View Status
This Section will display the current status of the study. If it has not been viewed yet, it will be marked as “Pending”. If it has been viewed, it will be marked as “Received”.
6. Access
This section contains four options related to the study that was shared, they are as follows
![]() View
View
This button allows you to view the study that was shared.
![]() Share
Share
This button will redirect you to the “Share Study” page and let you share the study with another person.
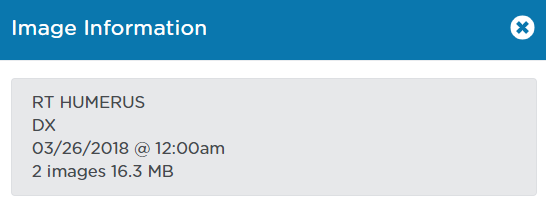
![]() Info
Info
This button will open a pop-up window at the top of the screen with a brief summary of the study’s information.
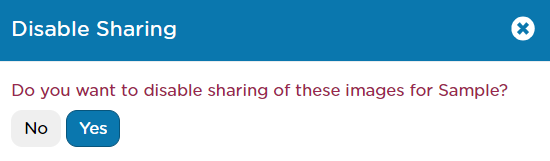
![]() Disable Sharing
Disable Sharing
This button will disable the share, revoking access of the study from the person the share was sent to. When clicked, a pop-up will open at the top of the screen. In order to complete the action, click the blue “Yes” button.
Shared w/Me
This tab will contain all of the studies that have been shared to your account.
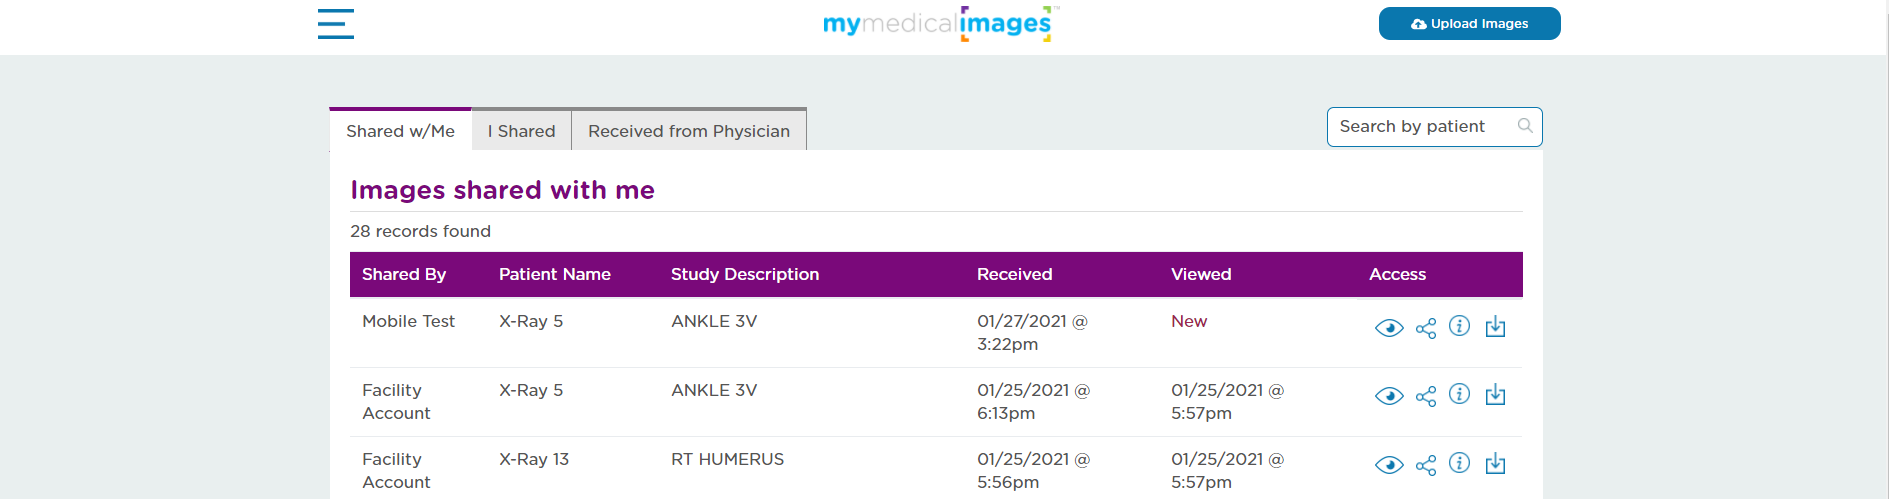
There are six sections of the table containing details related to the share.
1. Shared w/
This section contains the name and email address of the person the study was shared to.
2. Patient Name
This section details the name of the patient as it appears in the study.
3. Notes
This section will show the description you gave when you shared the image.
4. Shared on
This section will give the time and date the study was shared.
5. View Status
This Section will display the current status of the study. If it has not been viewed yet, it will be marked as “Pending”. If it has been viewed, it will be marked as “Received”.
6. Access
This section contains four options related to the study that was shared, they are as follows
![]() View
View
This button allows you to view the study that was shared.
![]() Share
Share
This button will redirect you to the “Share Study” page and let you share the study with another person.
![]() Info
Info
This button will open a pop-up window at the top of the screen with a brief summary of the study’s information.
![]() Download
Download
This button will allow you to download the study, or the attachments tied to the study. Choose “Download Images” for the study, or “Download Files” for the attachments in the submenu that opens when you click the download button.
When selecting study, a download request will be submitted to our site. When the request is completed, you can navigate to the Downloads page at mymedicalimages.com/download.
From Website
This tab contains a table listing any study uploads you have received from your Website Uploader.
(This tab will only exist if you have a webpage uploader active on your account.)
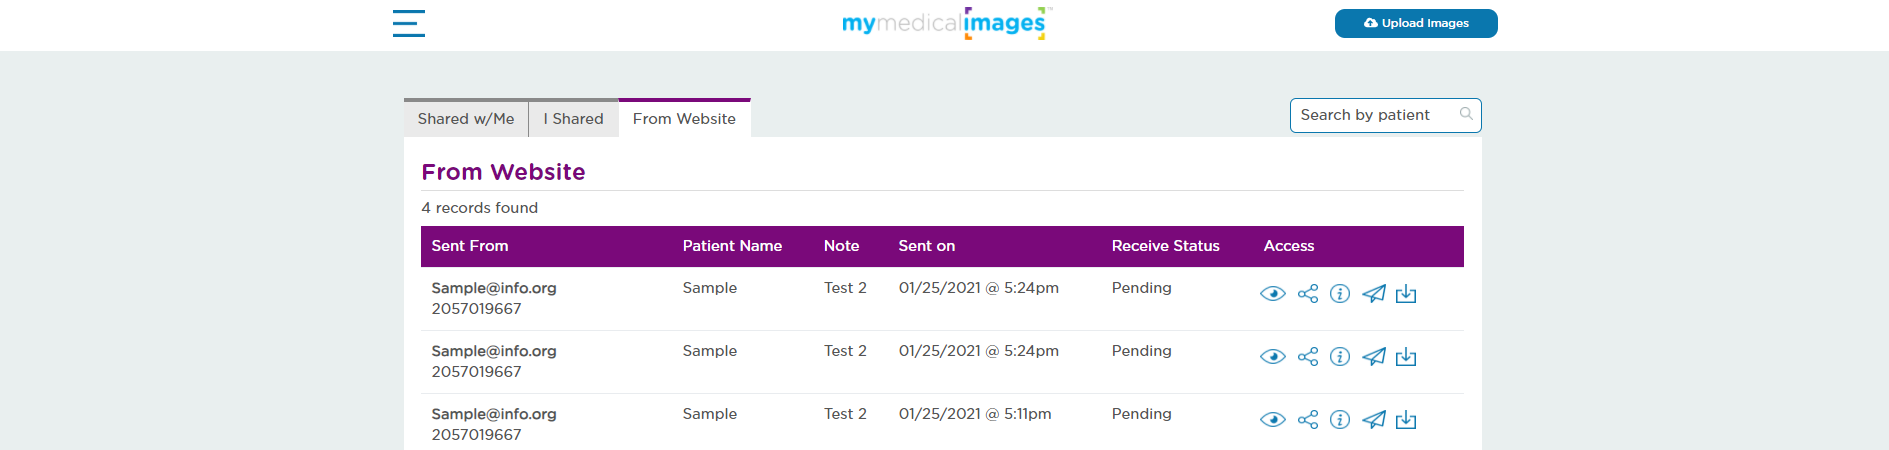
There are six sections of the table containing details related to the share.
1. Sent From
This section contains the name and email address of the person the study was sent by.
2. Patient Name
This section details the name of the patient as it appears in the study.
3. Notes
This section will show the description you gave when you shared the image.
4. Sent on
This section will give the time and date the study was upload to your account.
5. Receive Status
This Section will display the current status of the study. If it has not been viewed yet, it will be marked as “Pending”. If it has been viewed, it will be marked as “Received”.
6. Access
This section contains four options related to the study that was shared, they are as follows
![]() View
View
This button allows you to view the study that was shared.
![]() Share
Share
This button will redirect you to the “Share Study” page and let you share the study with another person.
![]() Info
Info
This button will open a pop-up window at the top of the screen with a brief summary of the study’s information.
![]() Send
Send
This button will open a pop-up window that will allow you to use our Send to Patient feature for the study.
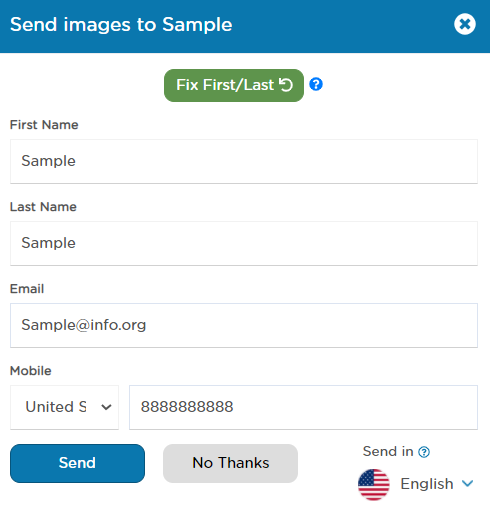
Fill out the form with the patient’s first and last name, their email address, and their phone number. Once the form is filled, click on the blue “Send” button to send the images.
![]() Download
Download
This button will allow you to download the study, or the attachments tied to the study. Choose “Download Images” for the study, or “Download Files” for the attachments in the submenu that opens when you click the download button.
When selecting study, a download request will be submitted to our site. When the request is completed, you can navigate to the Downloads page at mymedicalimages.com/download.


