

Managing Your Exam Rooms
Step 1: Log-in to your mymedicalimages account at https://app.mymedicalimages.com/.
Step 2: Open the menu in the top left-hand corner of the page, click on the “Exam Room” dropdown menu and select the “Manage” option.
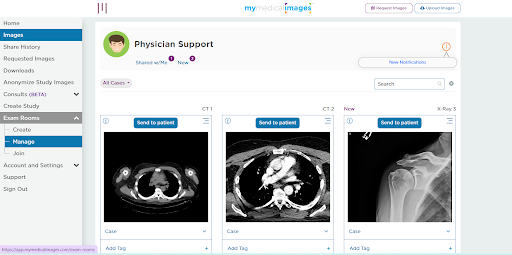
Once you have landed on the Manage exam rooms page, you will have access to all of the rooms you have created in the form of a history table.
Listed below is a brief summary of the values given by the table, as well as some of the features that you will have access to.
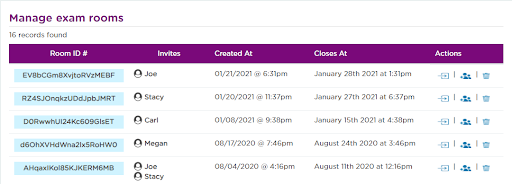
Room ID #: This column shows the identification number assigned to the particular room. Anyone that has access to this code will be able to enter the room using the “Join Room” feature of our website.
Invites: This column shows the name of the individual that received the invite to the exam room.
Created At: This column lists the date the exam room was first created.
Actions: This column contains the actions you can take with the room you created. They are as follows from left to right.
1. Join Room – This allows you to join any room you have made.
2. Add Patients – This will allow you to add additional patients to a single exam room. The additional patients will be grouped together with the first one in the Invites column.
3. Delete Room – This will allow you to delete any rooms that are no longer needed.


