
Uploading Images Using A Physician’s Webpage Uploader
Step 1: Navigate to the physician’s mymedicalimages webpage uploader. This can be done by entering the address for the webpage. The address for the webpage will be https://app.mymedicalimages.com/fupi/(physician’s extension)
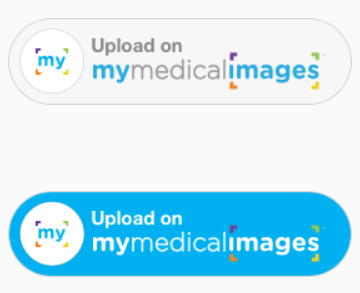
Alternatively, your physician may have a “Upload on mymedicalimages” button, similar to one of the buttons displayed below. You can click on these to be taken directly to the web uploader.
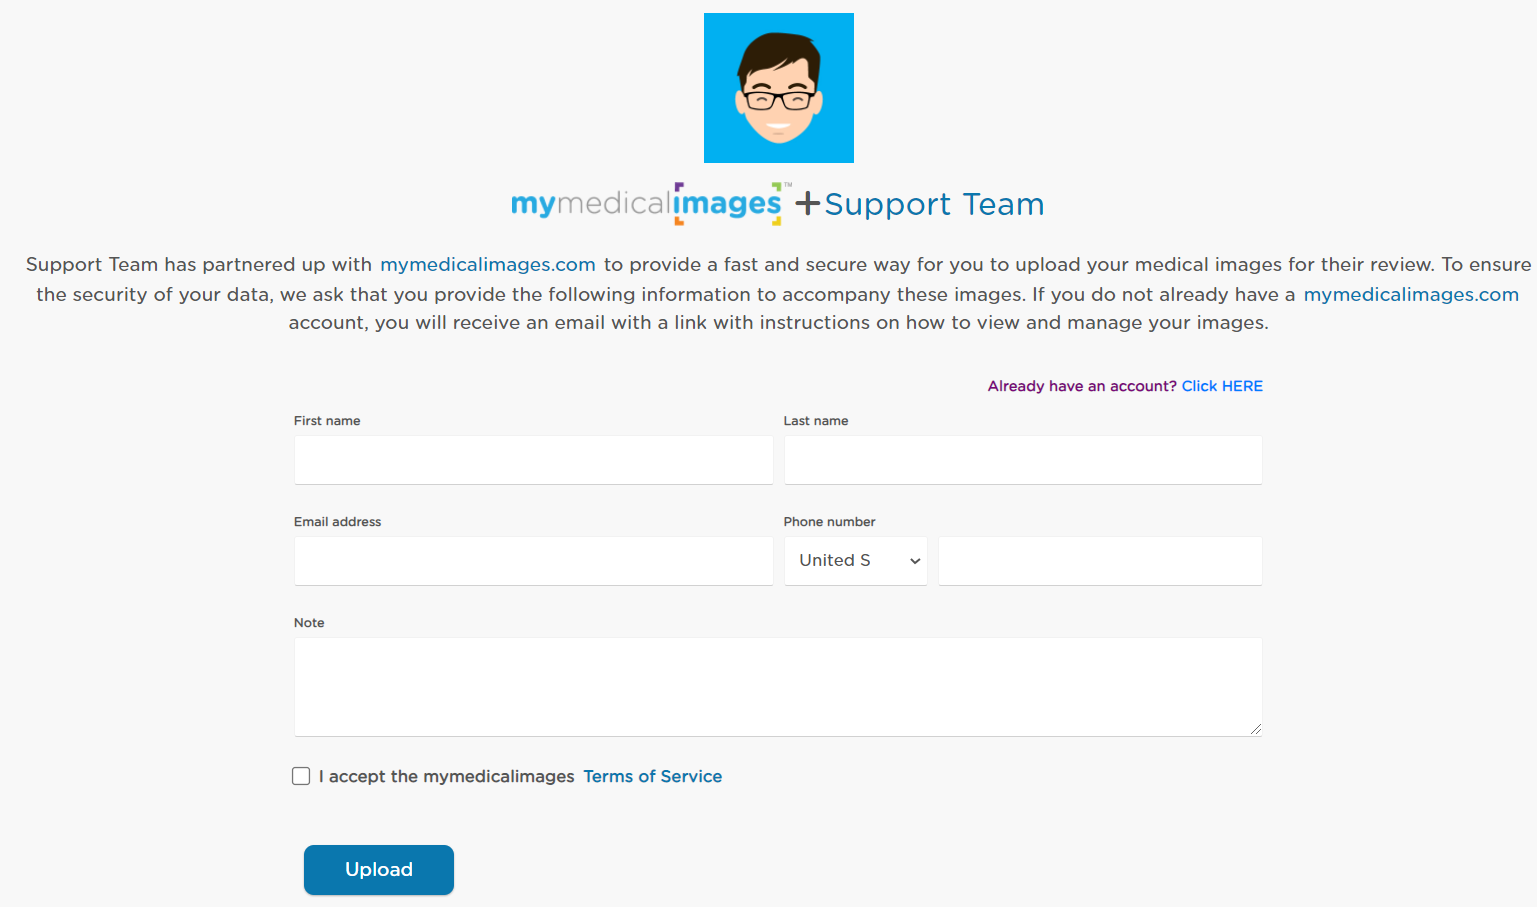
Step 2: If you do not have an account, fill in your information in the text fields given, along with a brief description of the images you are uploading. Then click on the “I accept the mymedicalimages Terms of Service” checkbox, and click on the blue “Upload” button.
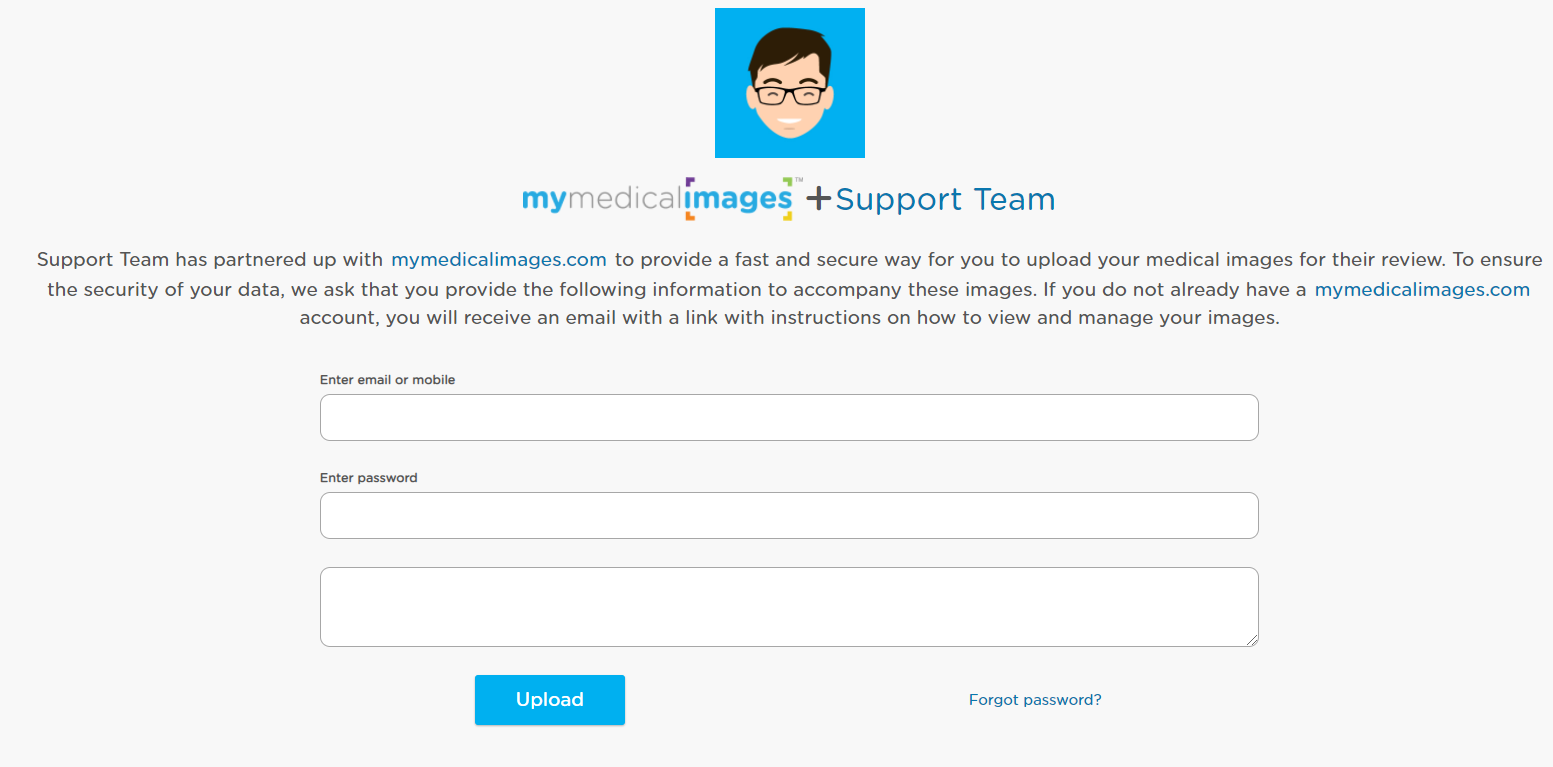
If you already have an account with mymedicalimages, click on the blue “Click HERE” button.
Enter in your account information, along with a brief description of the images you are uploading, then click on the blue “Upload” button.
Step 3: Select the file source.
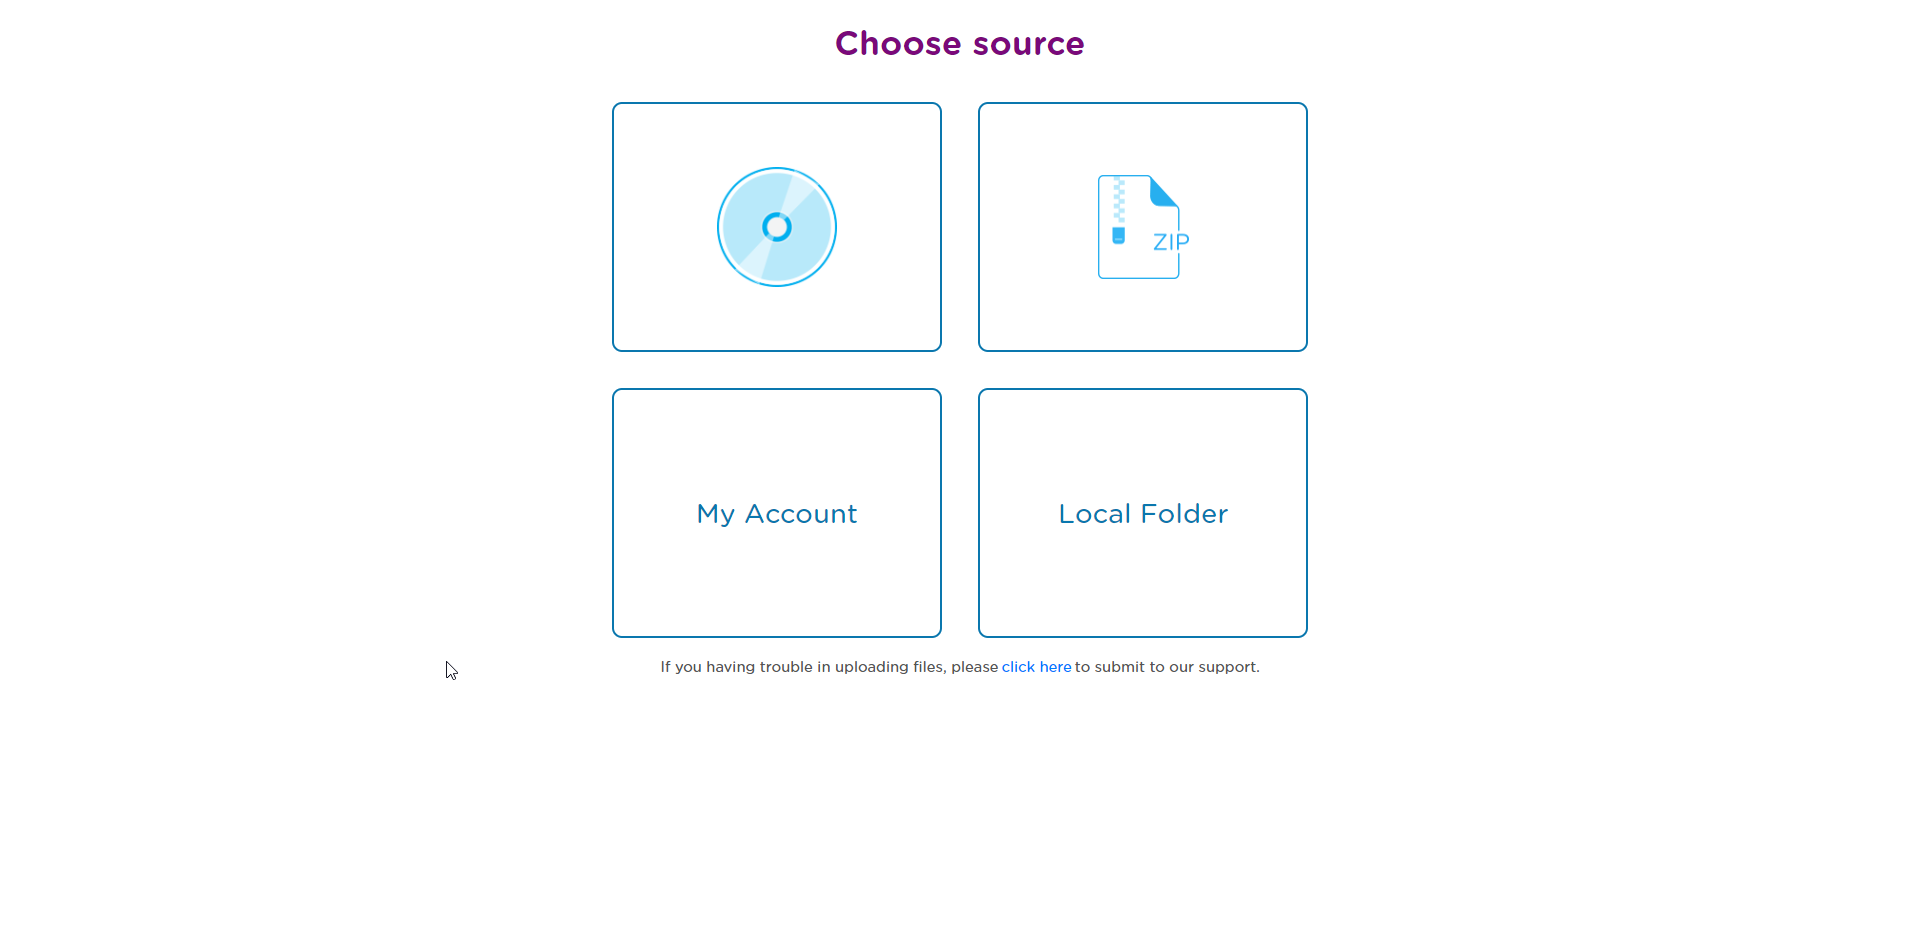
You will have the option to pick between a CD, a .zip file, My Account or Local Folder. If the images you are attempting to upload are not on a CD or contained in a .zip file, you will need to select the Local Folder option.
The following steps you need to take will change depending on what source type you choose.
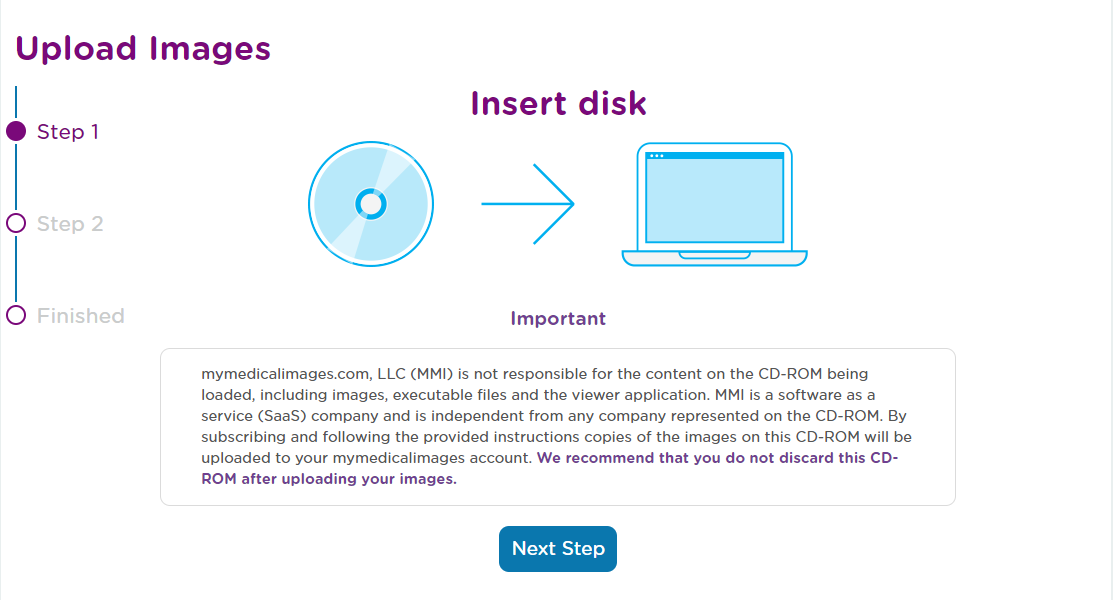
For CD:
1. Insert the disk and click on the next button.
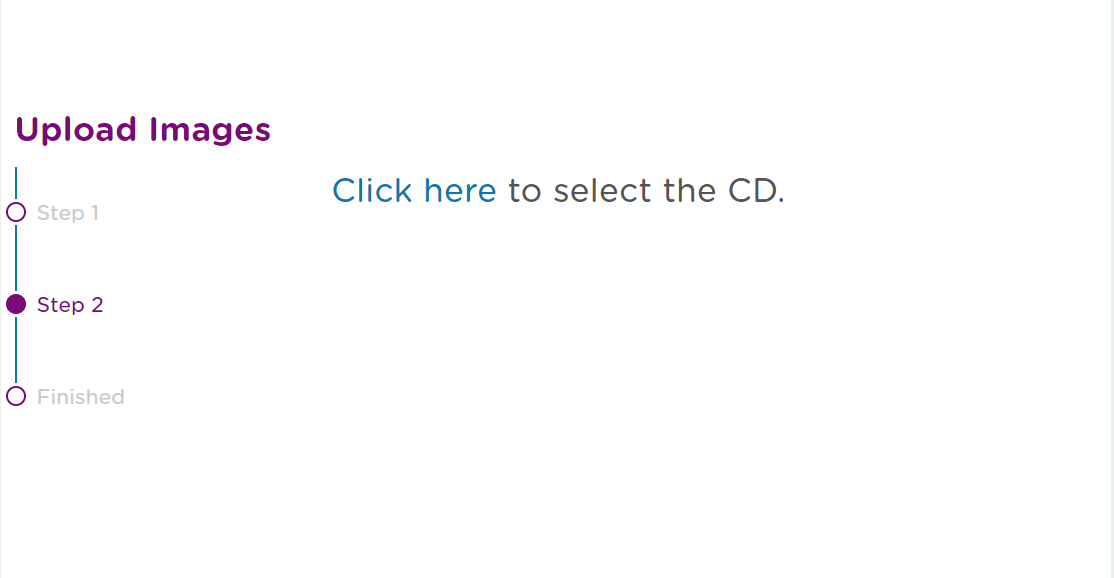
2. Click on the “Click Here” button to open the file explorer window.
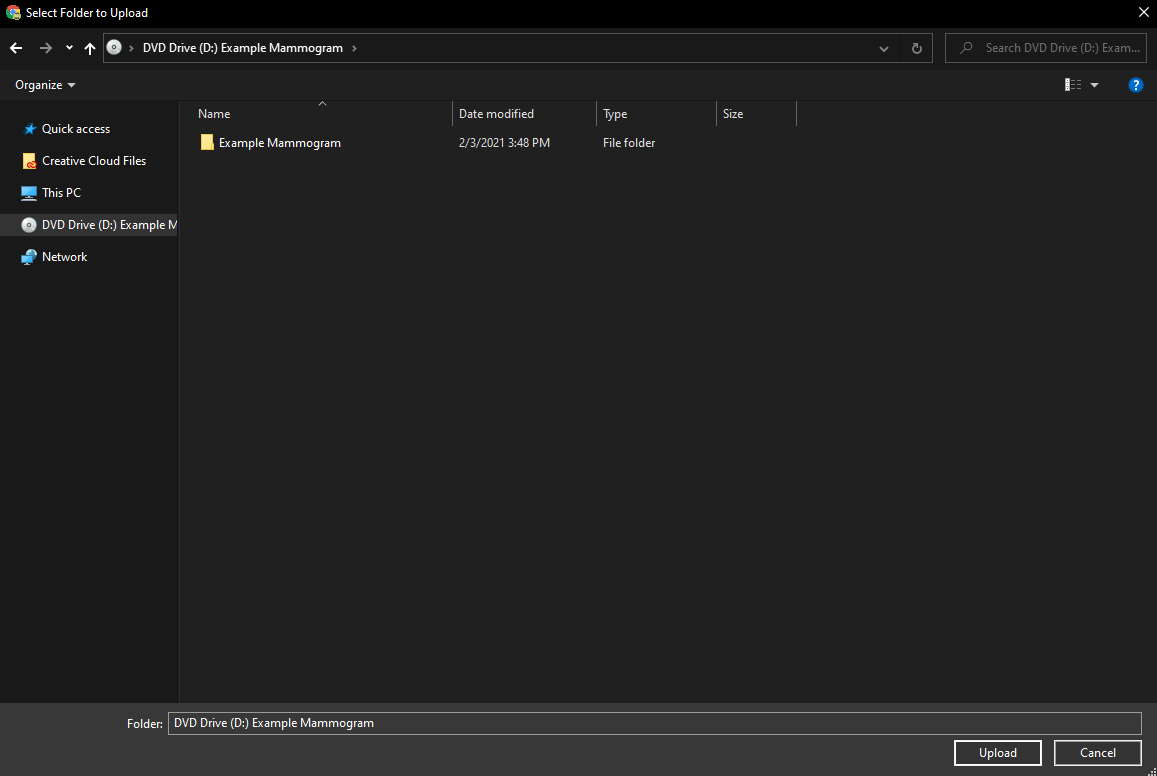
3. Select your computer’s CD Drive then click “Upload” in the bottom corner of the pop-up window.
4. Proceed to Step 4.
For .zip:
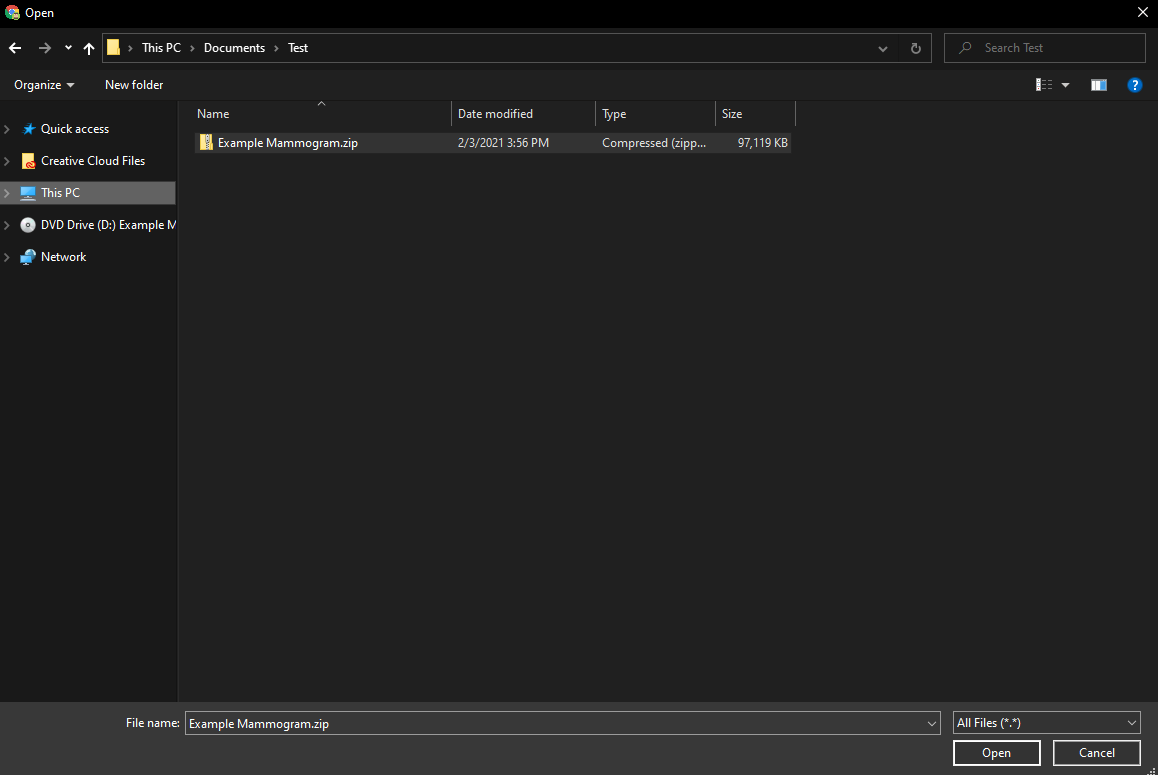
1. Click on the “Click here” button to open the file explorer window.

2. Navigate to the .zip file you wish to upload and select it. Then choose “Open” in the bottom right corner.
3. Proceed to Step 4.
For My Account:
1. select the study you would like to upload by clicking on the box under the “Selected” section of the table on the same line as the study you would like to send.
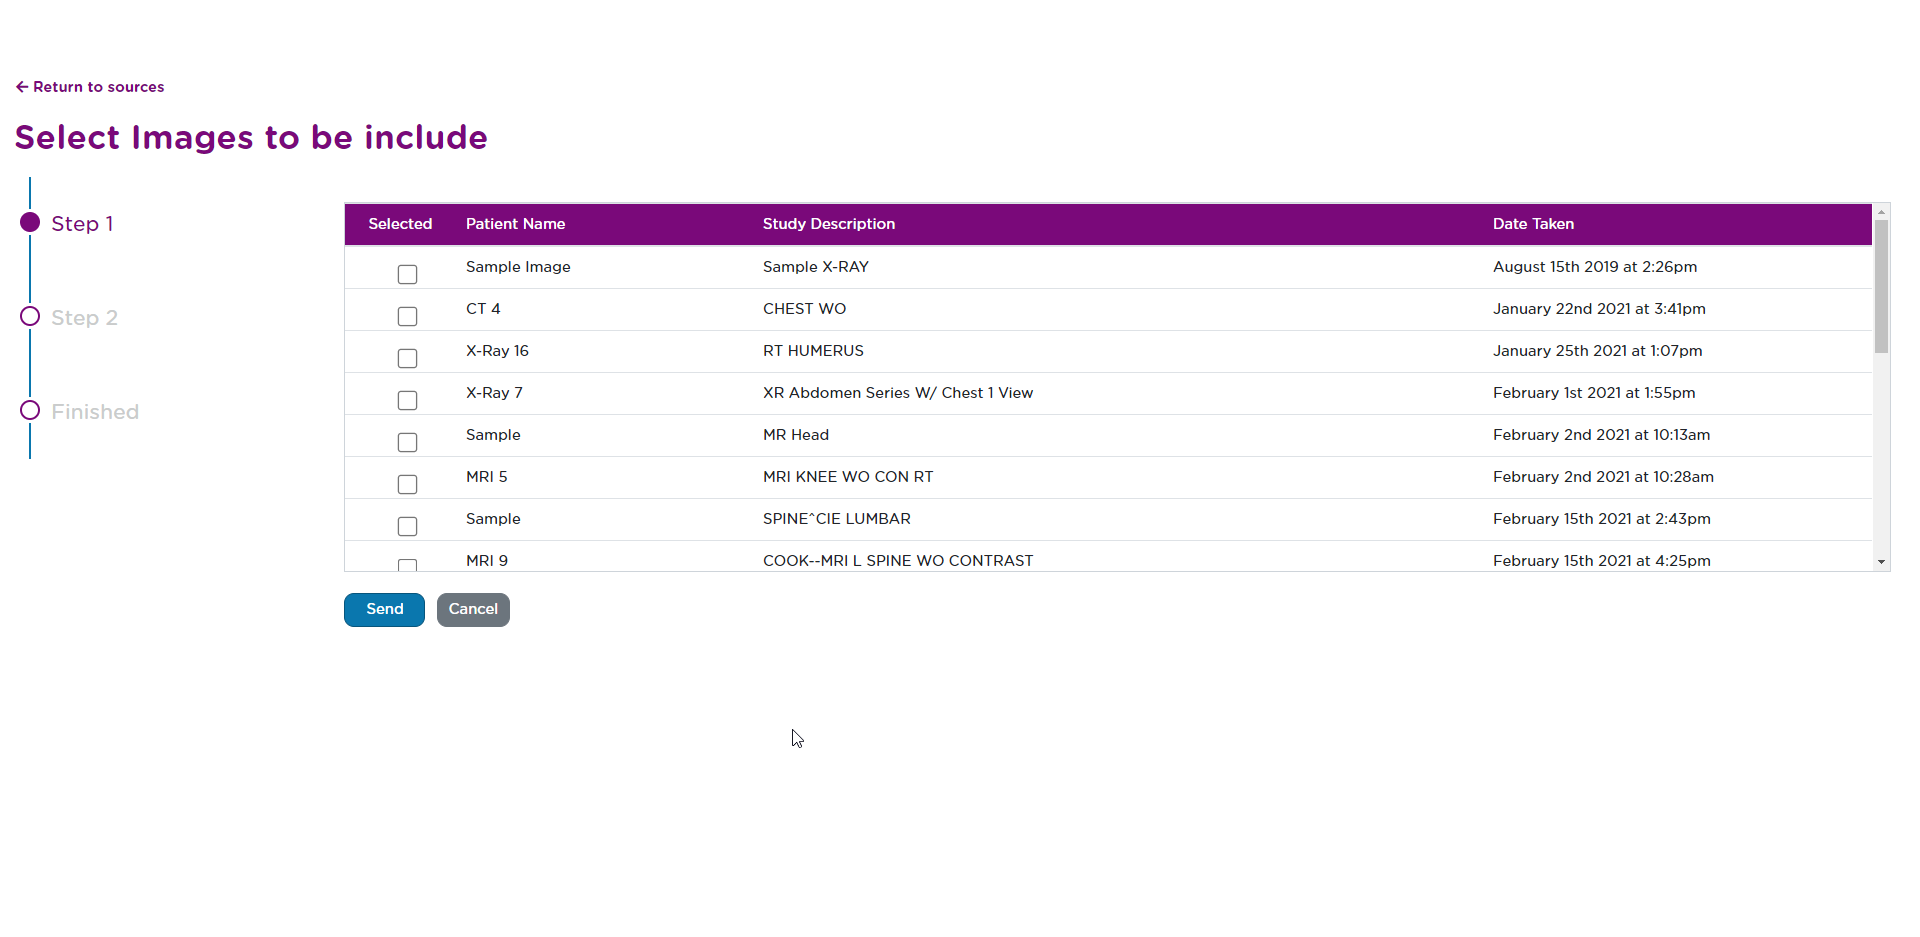
A selected study will have it’s box filled with a blue checkmark. You can select multiple studies this way. When you have selected all of the studies you wish to upload, click on the blue “Send” button.

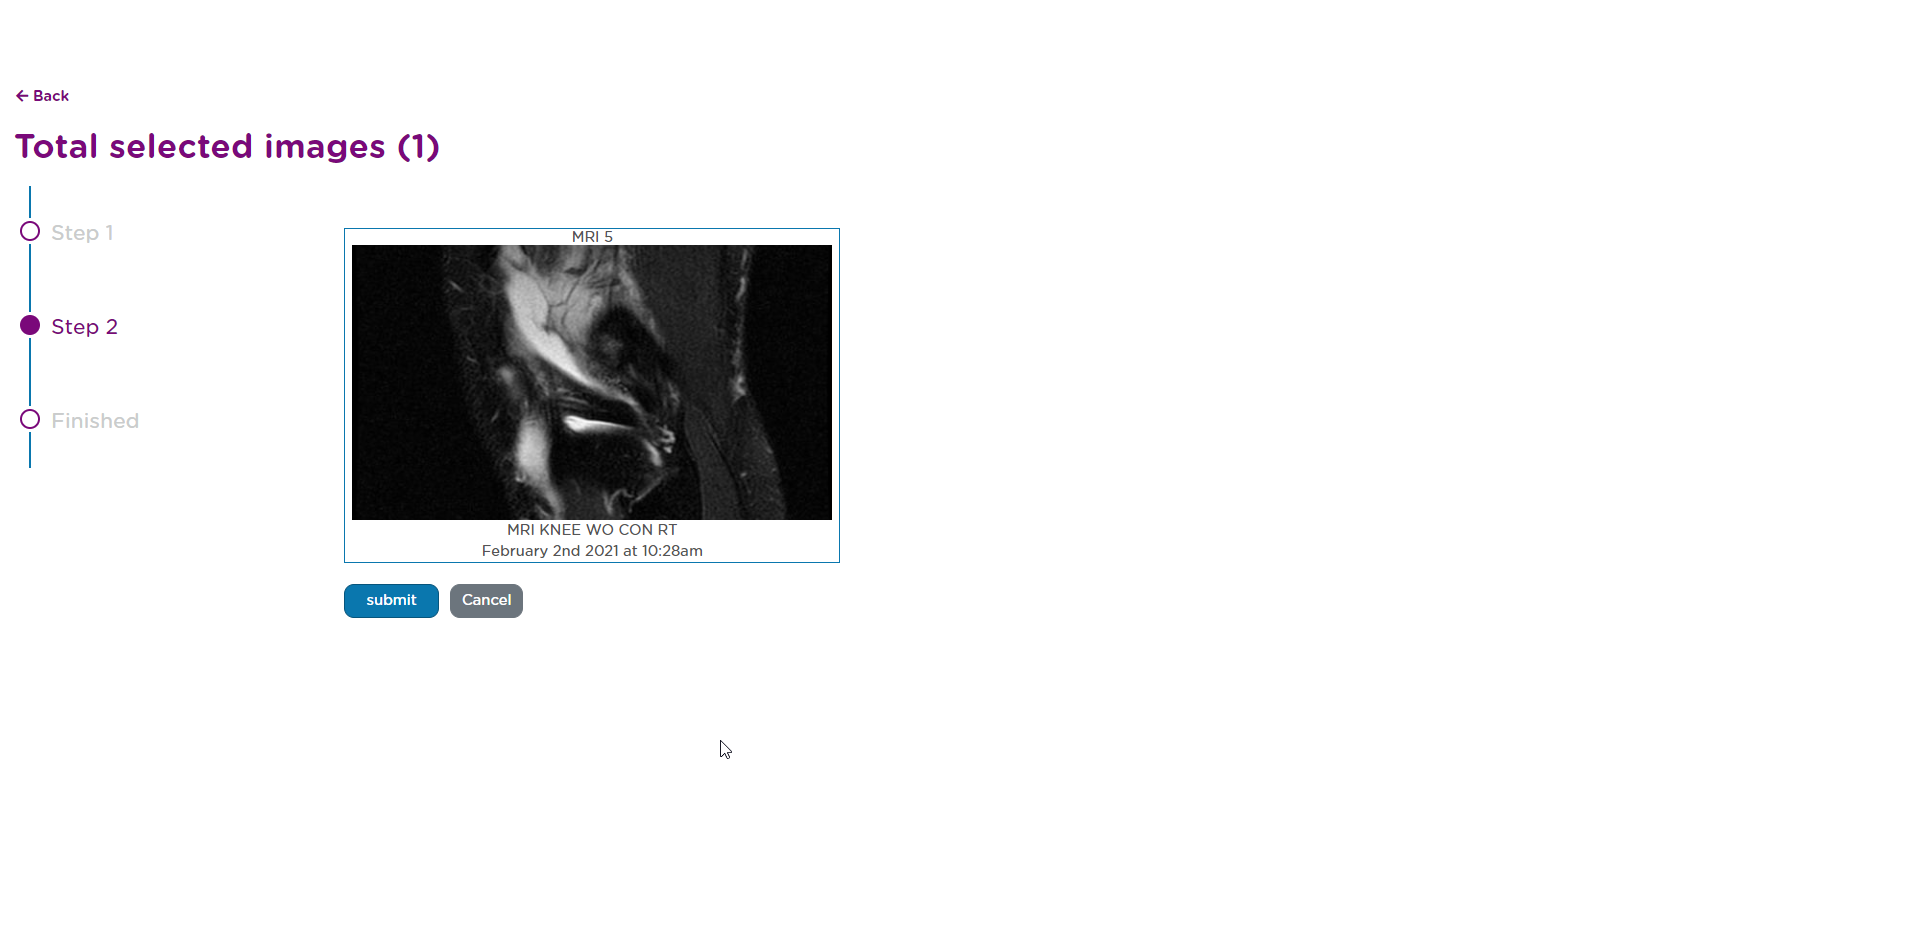
2. You will be shown a preview of the studies that you have selected for sending. After confirming that these are the correct studies, click on the blue “submit” button. If the studies are incorrect, you can click on the grey “Cancel” button to return to the previous step.
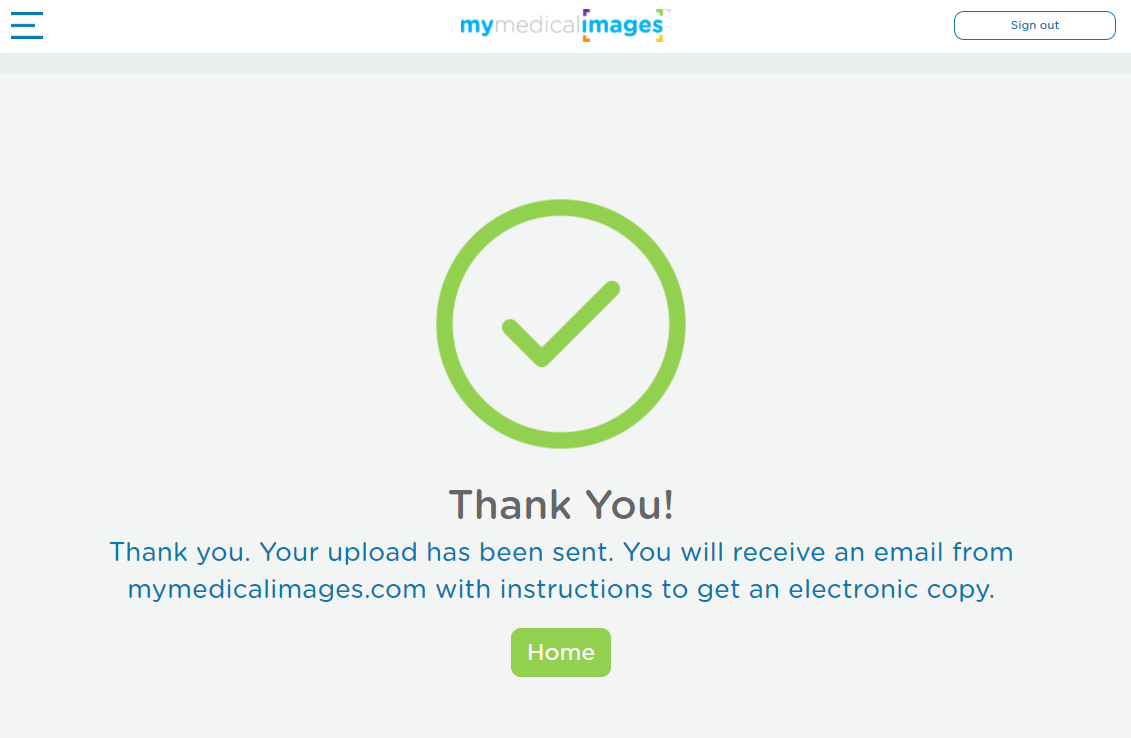
3. Once the upload is complete, you will be redirected to the thank you page.
For Local Folder:
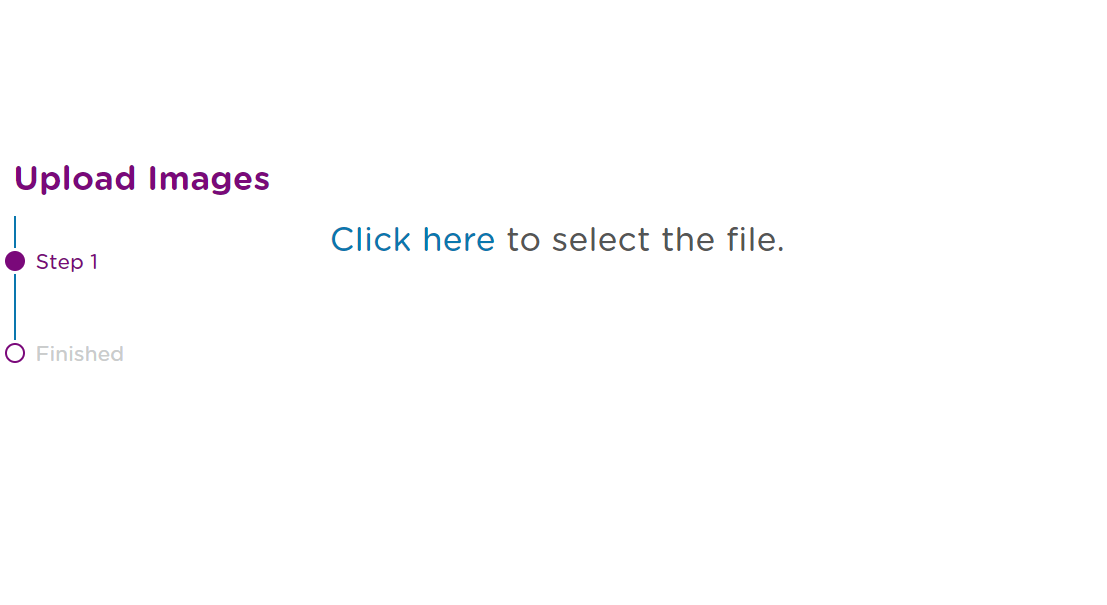
1. Click on the “Click here” button to open the file explorer window.
2. Navigate to the file you wish to upload and select it. Then choose “Upload” in the bottom right corner.
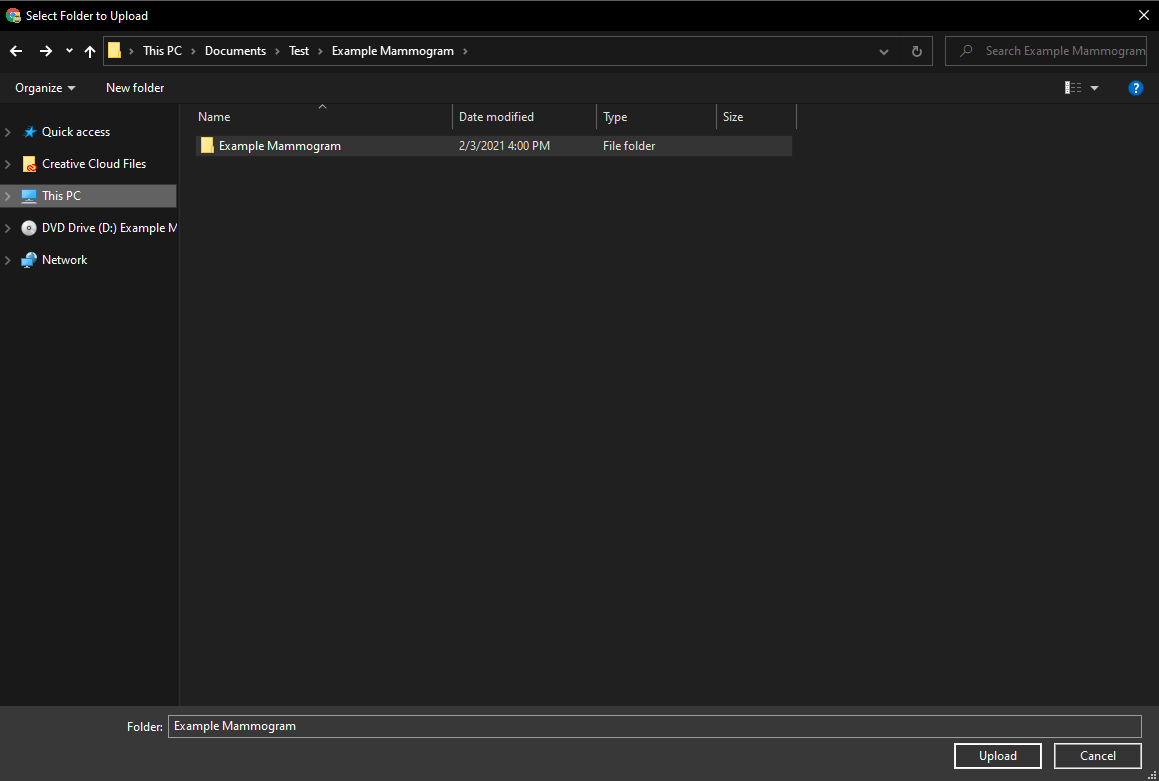
3. Proceed to Step 4.
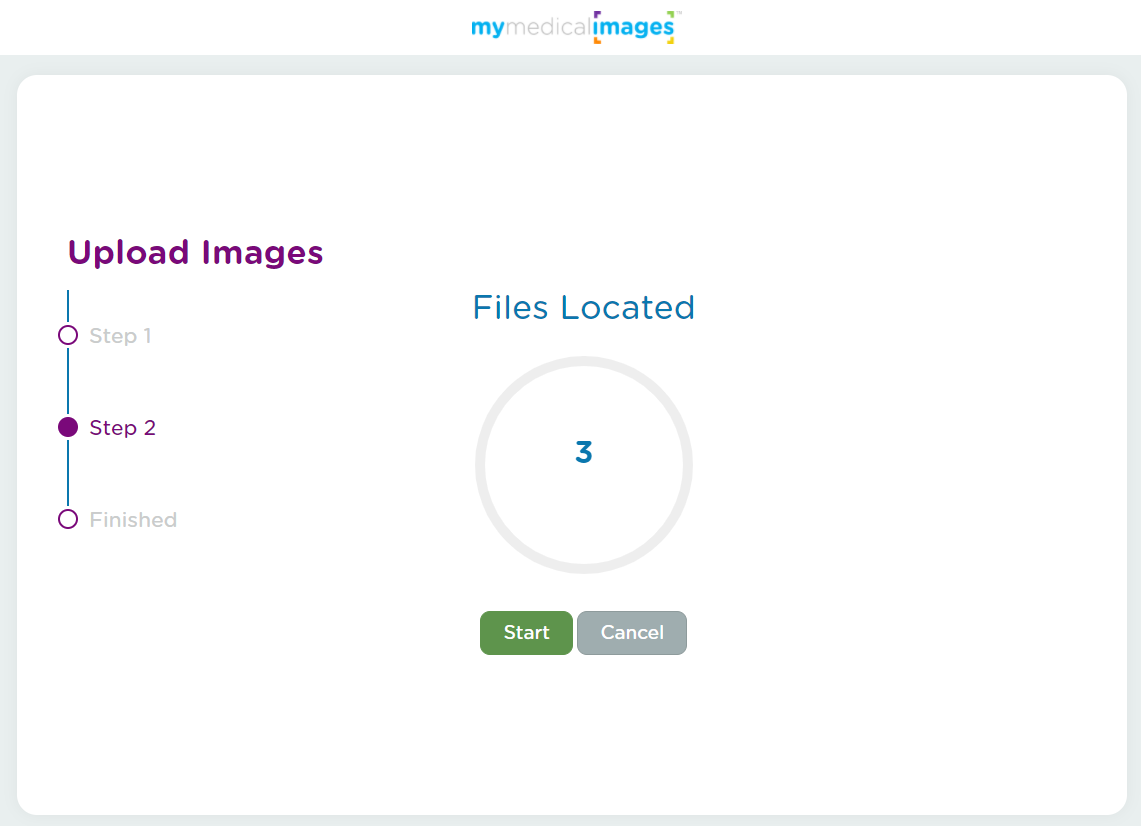
Step 4: You will be taken to the upload page. This page will display the amount of studies that are about to be uploaded inside of the progress bar in the center of the screen. Click on the green “Start” button to begin uploading your images.
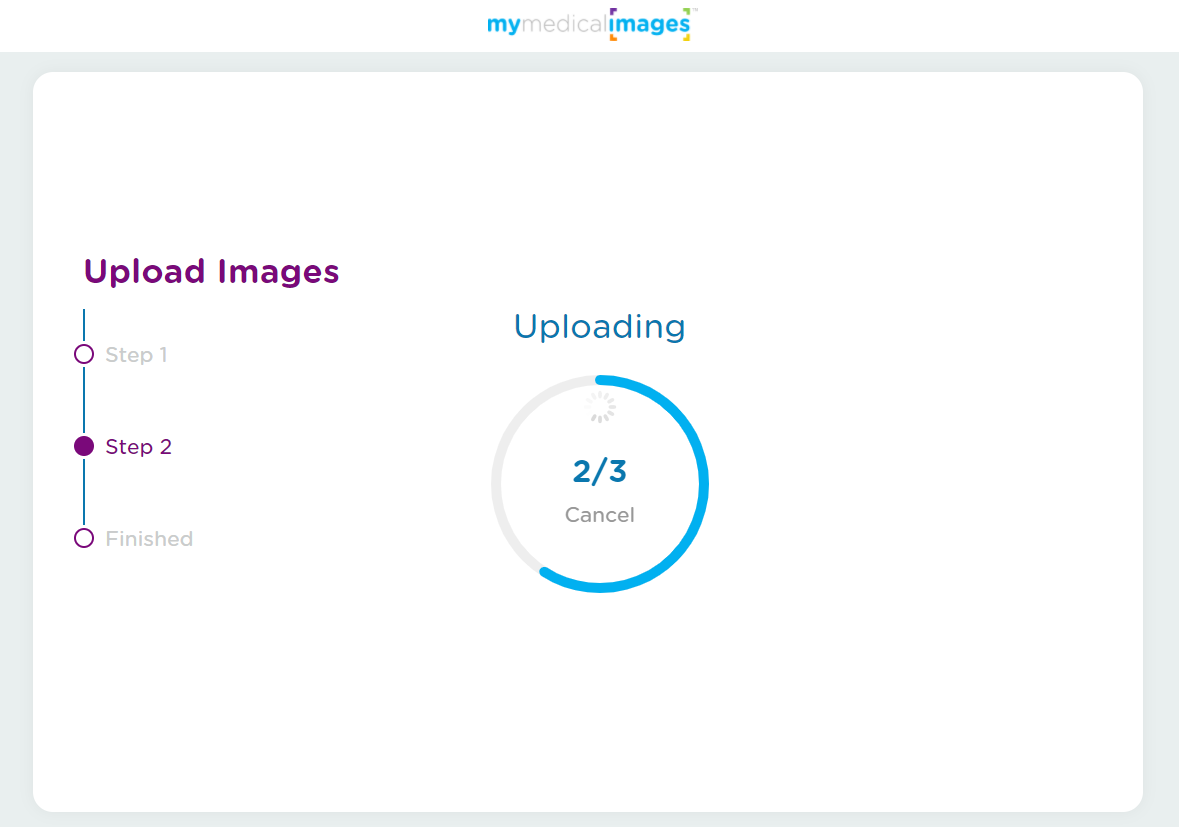
Once the upload begins, the progress bar will begin to fill as the files are uploaded to mymedicalimages.com.
Depending on the amount of files being uploaded, this may take a while to complete. Please make sure that you leave the page open and remain connected to the internet for the entire duration of the upload, or you may encounter issues, such as corrupted files.
Once the upload is complete, you will be redirected to the thank you page.
You can click on the home button to return to your mymedicalimages account, where a copy of your images can be found on the dashboard. If you did not have an account before the upload, a new, basic account will be created for you with your images copied into it.


