
Sharing Images With a Physician – New Account
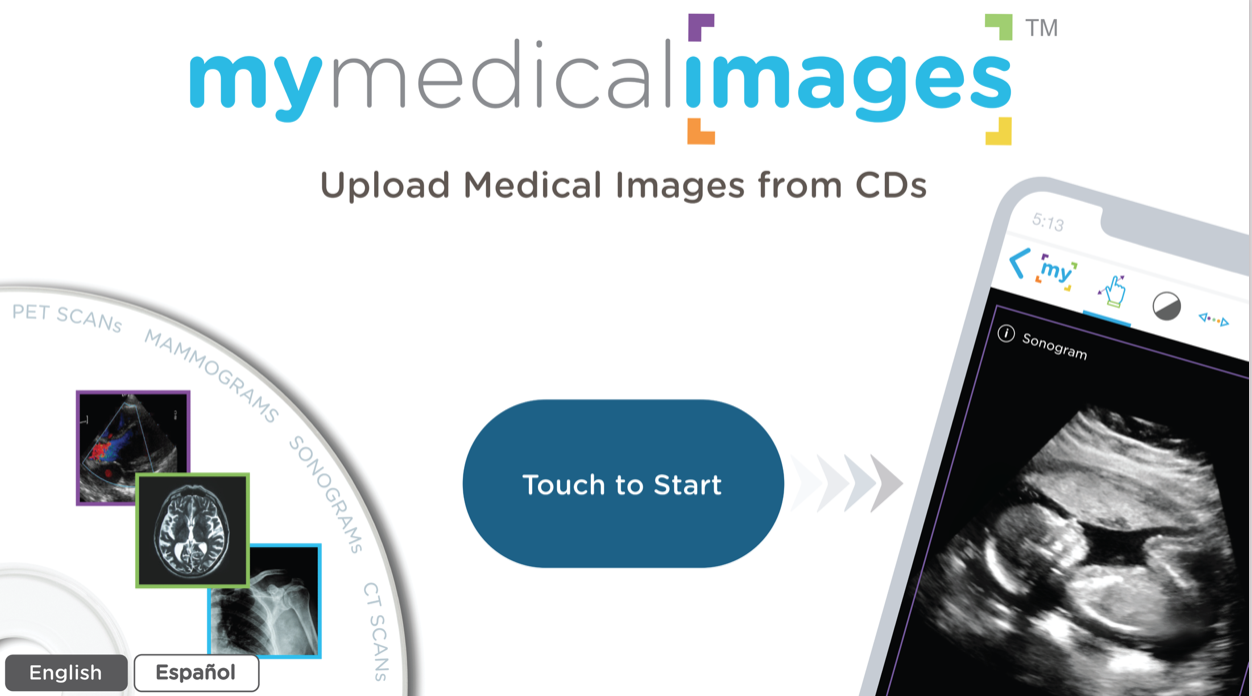
Step 1: Tap Touch to Start
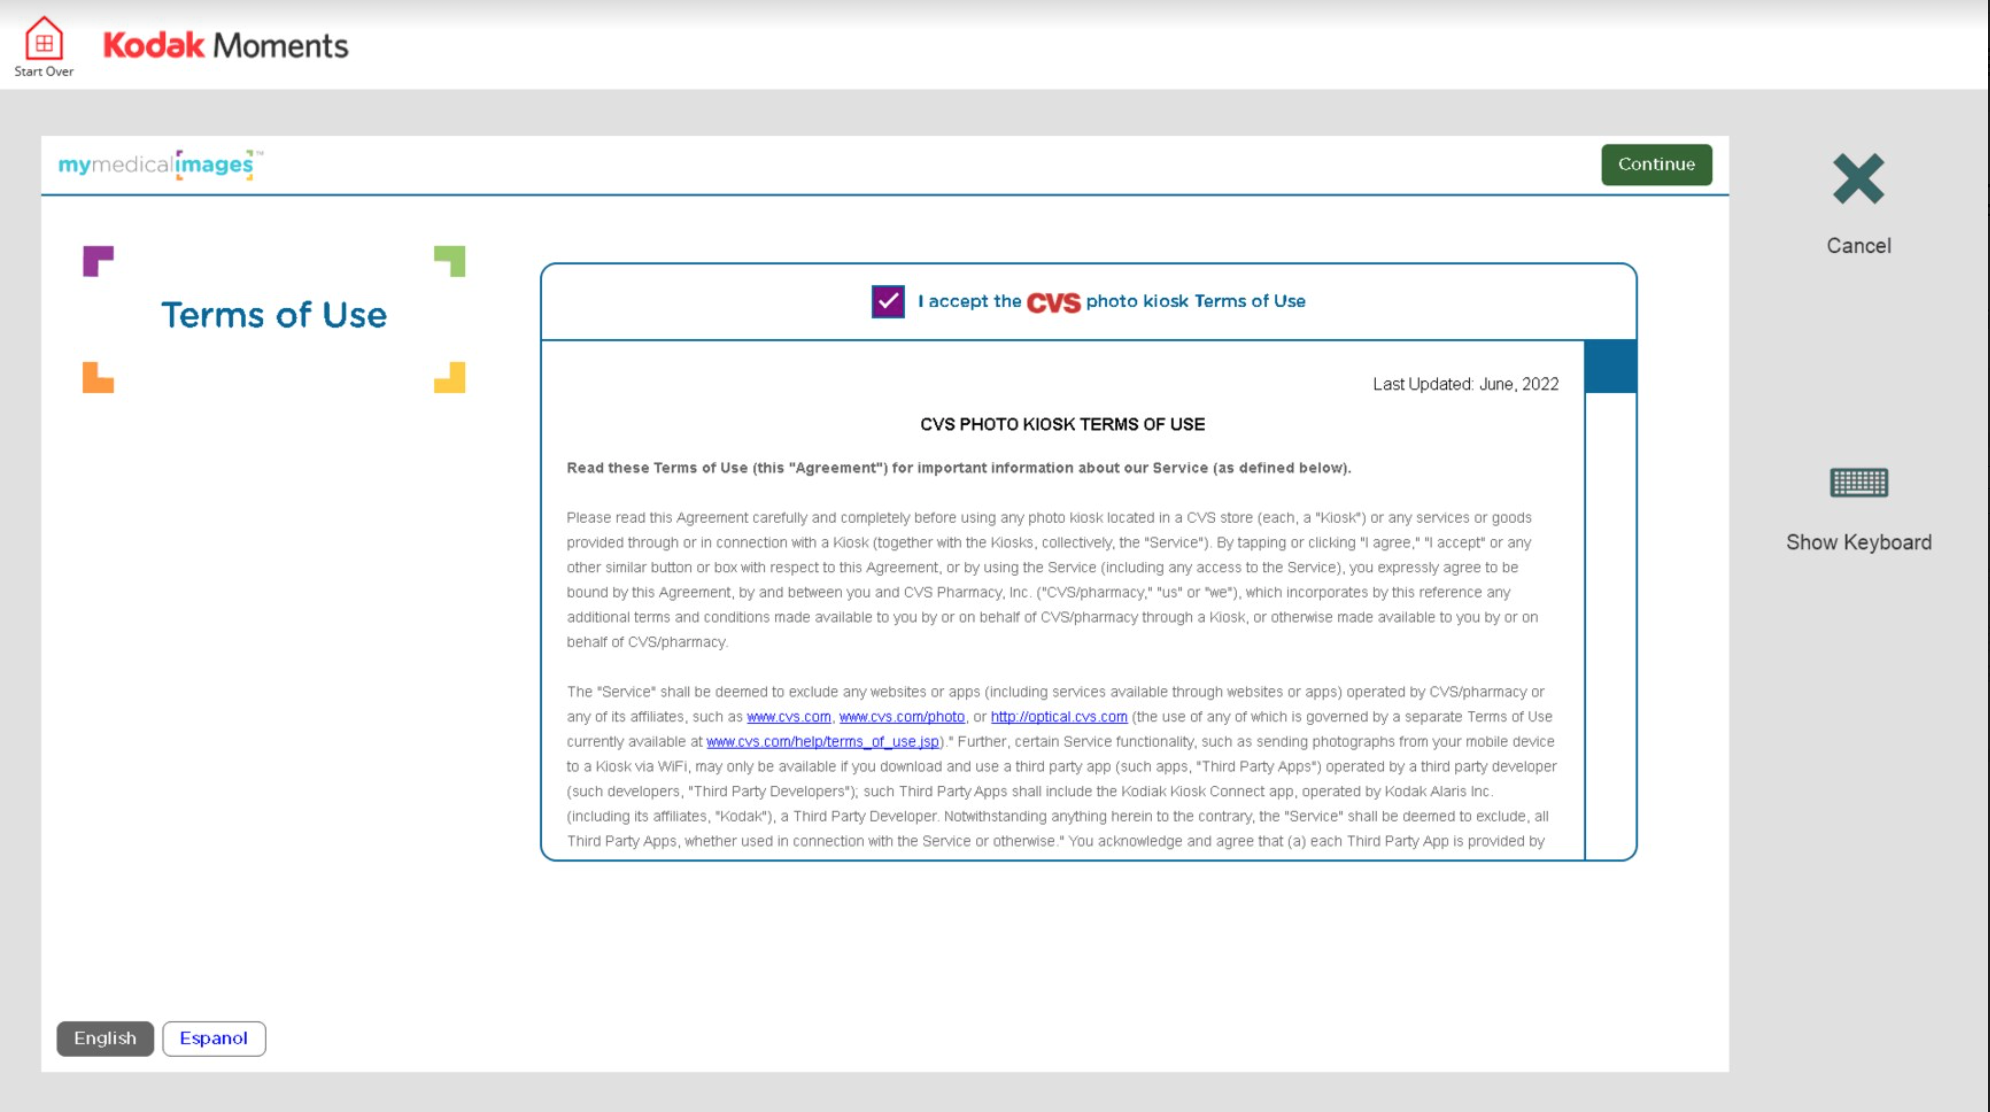
Step 2: Accept the CVS Photo Kiosk terms of use and tap continue.
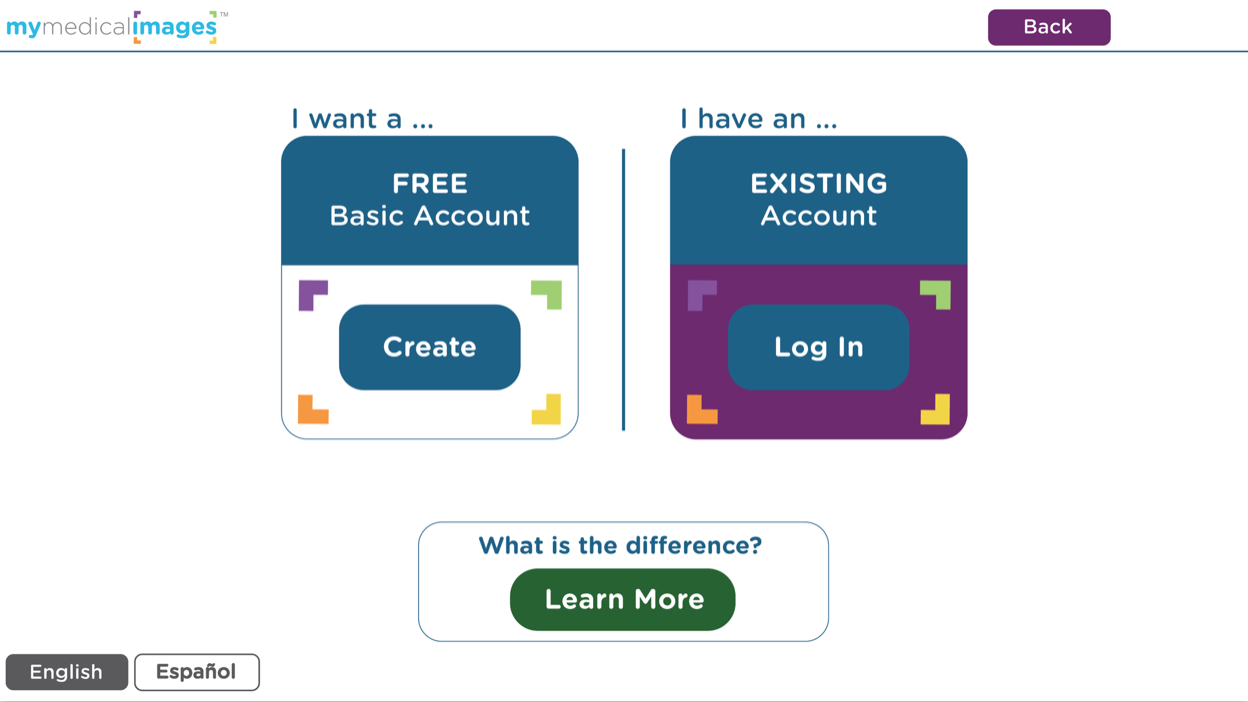
Step 3: Tap “I want a FREE Basic Account”
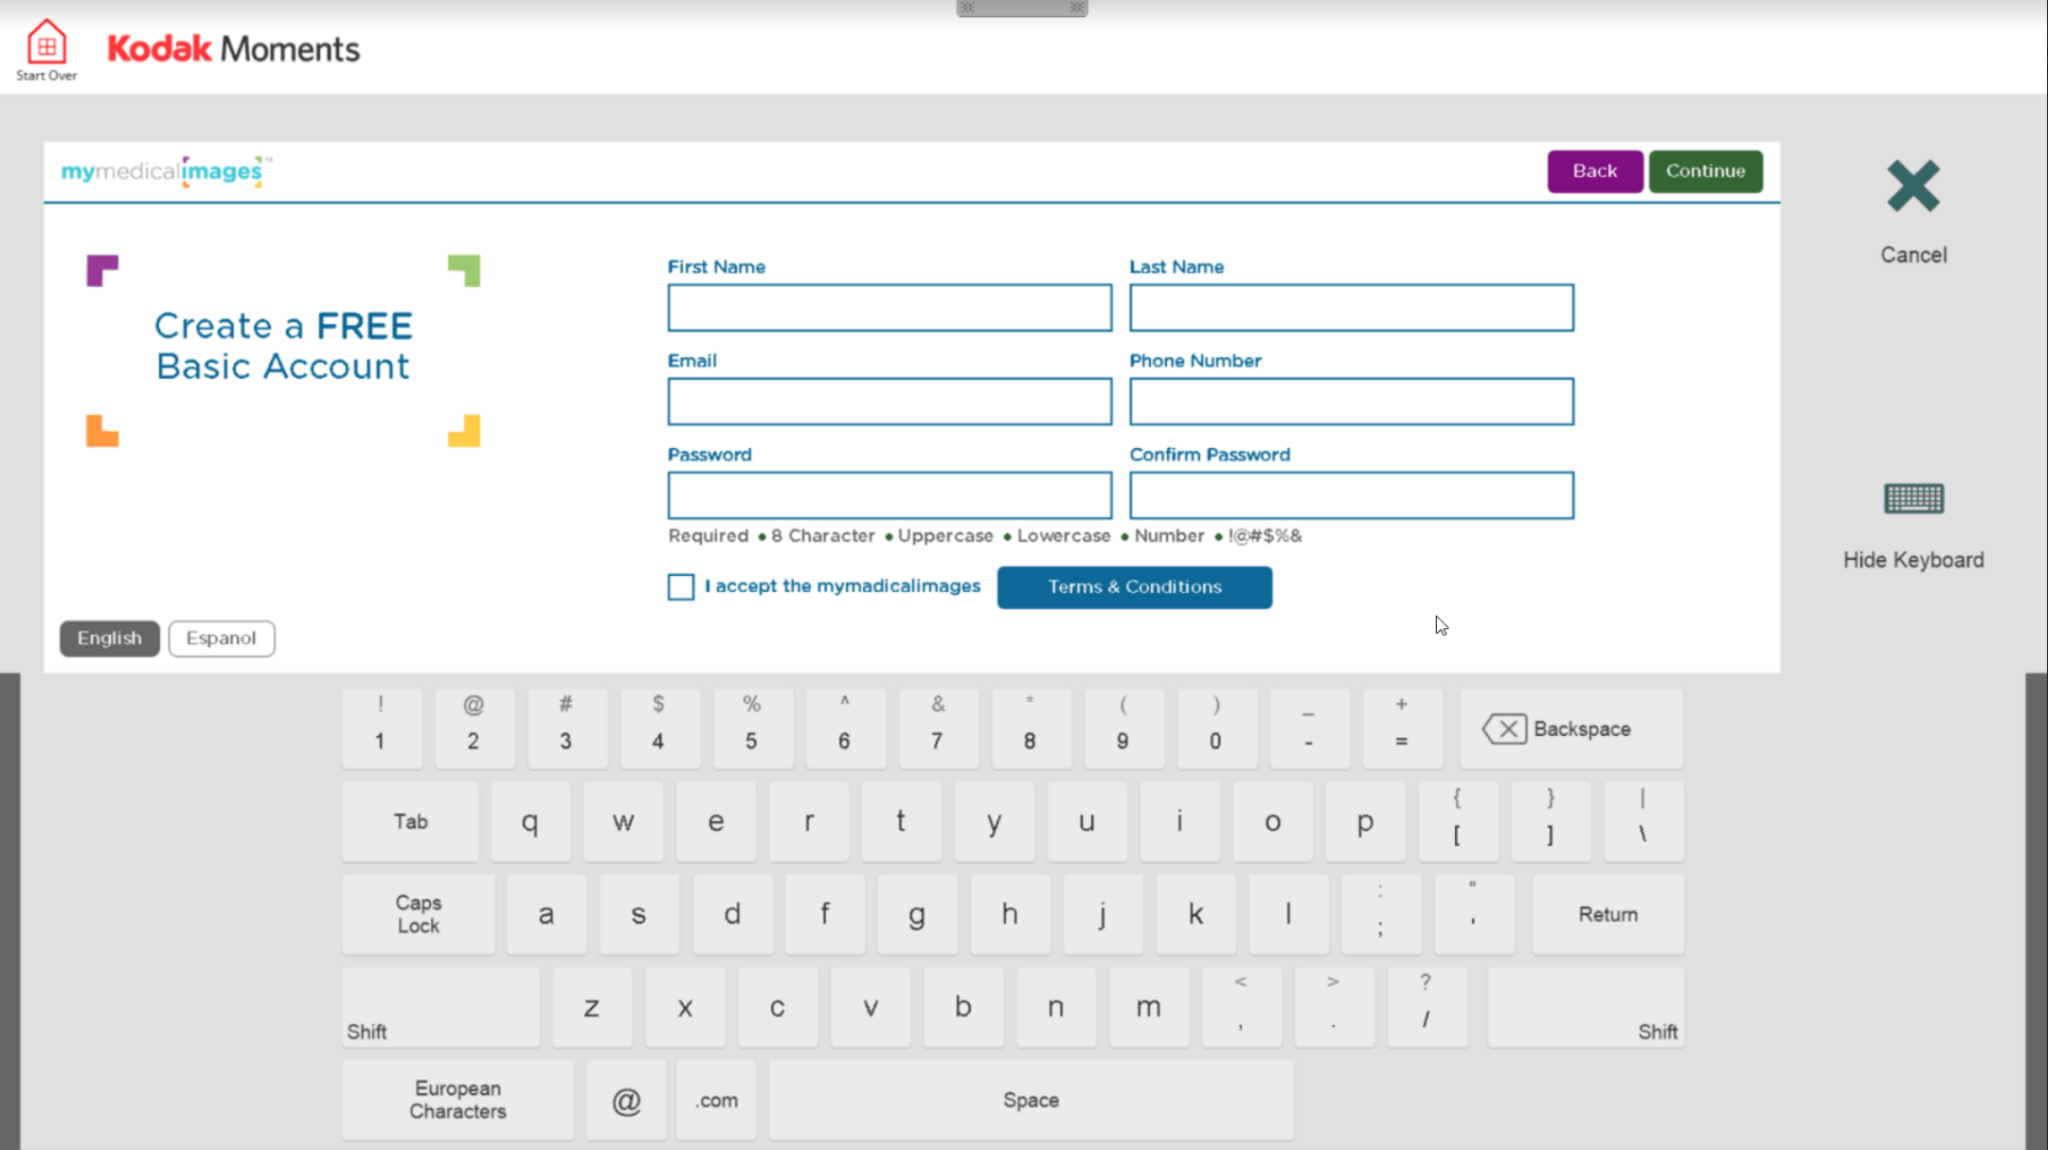
Step 4: Enter your information in the spaces provided, check the terms and conditions box and tap “Continue”
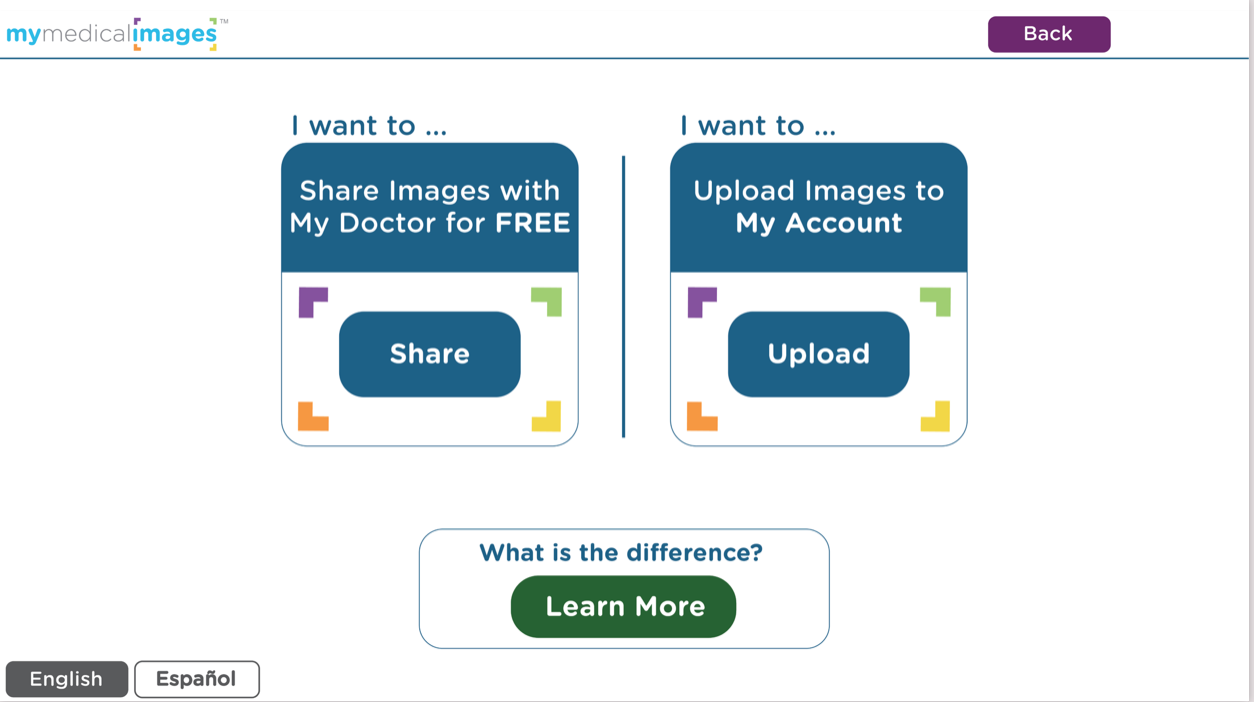
Step 5: Tap “Share Images With My Doctor For Free”
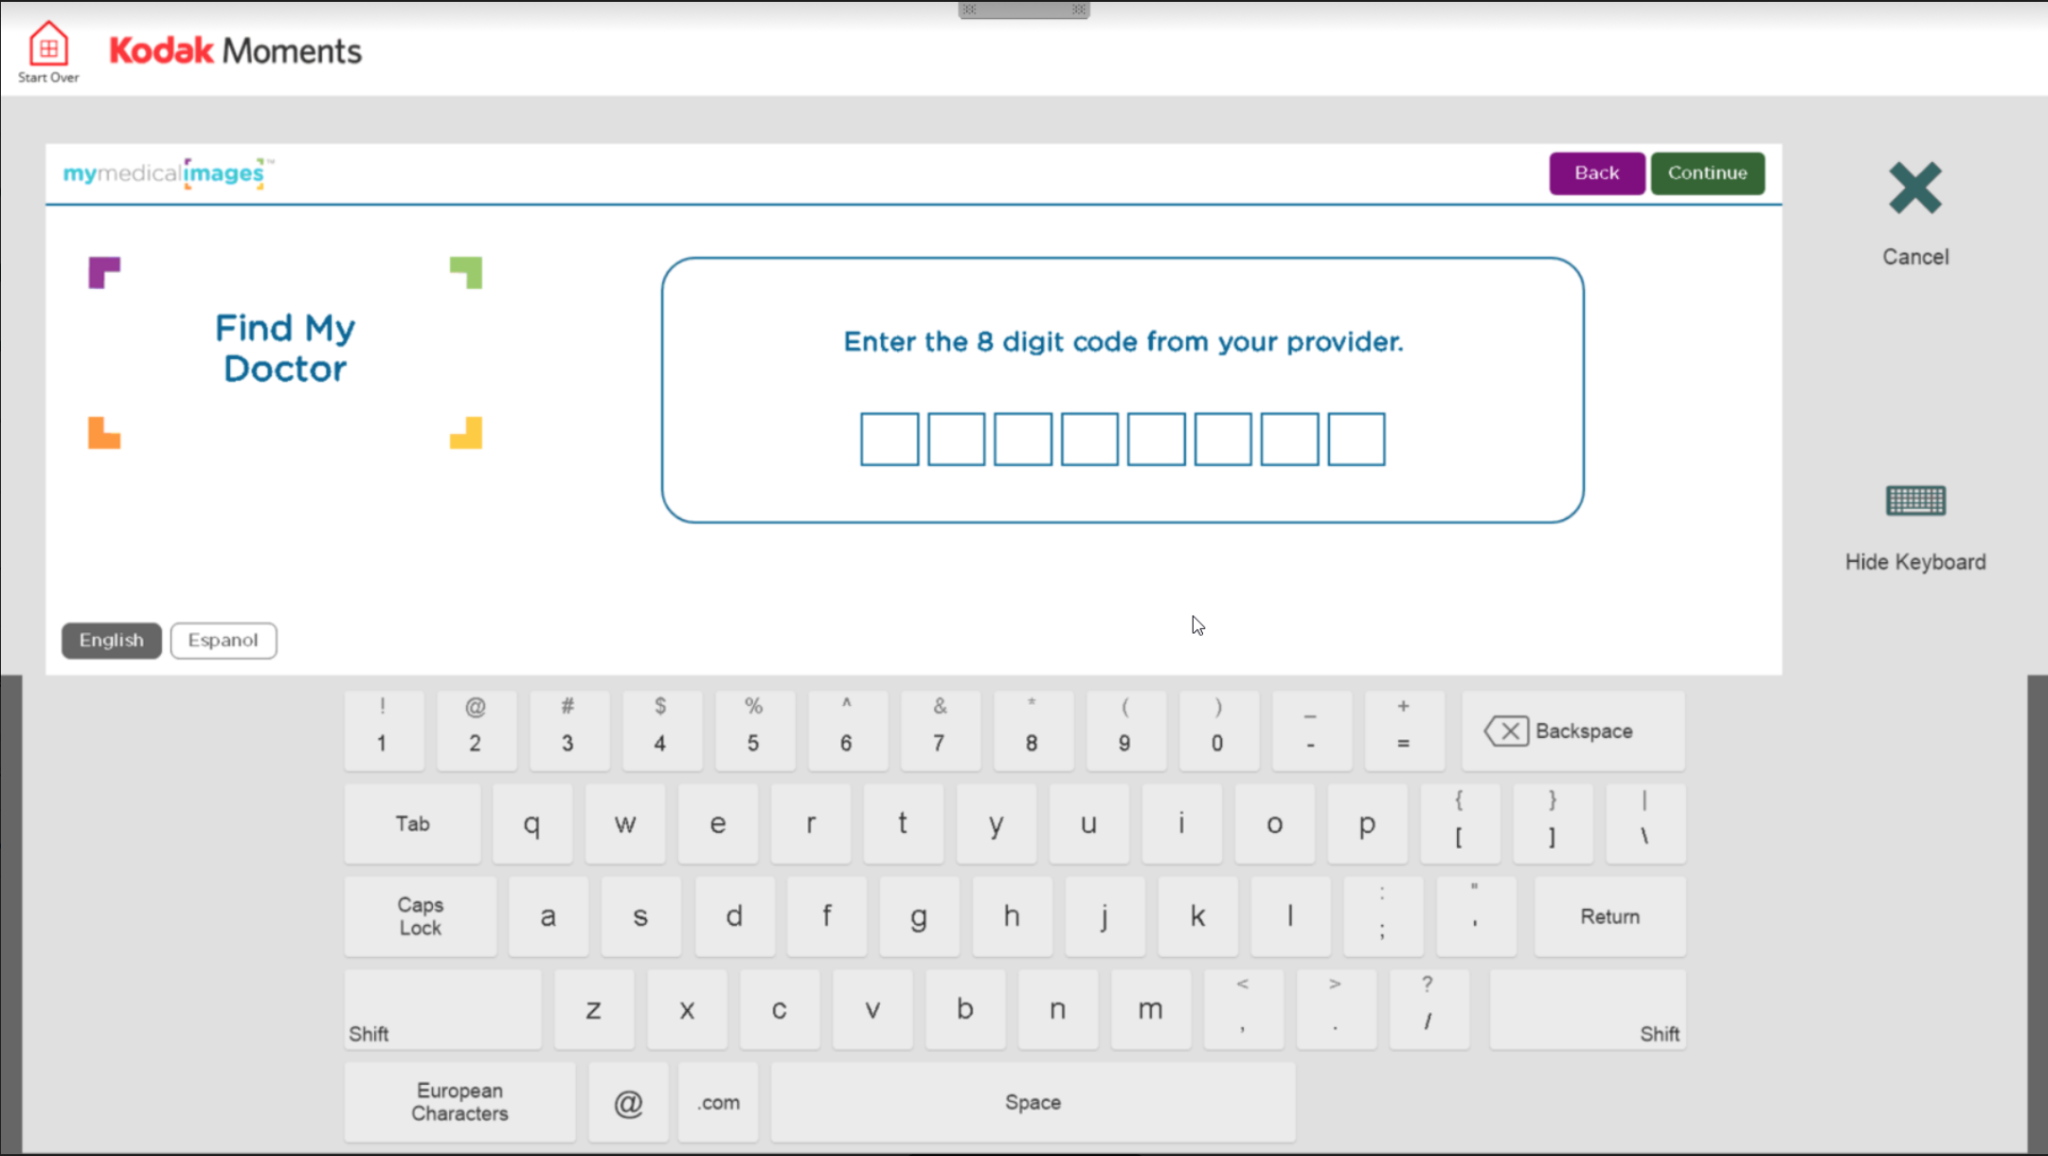
Step 6: Enter the eight digit code provided by your physician and tap “Continue”
*Hint* If you are unable to find your physicians code, check their practice homepage near the mymedicalimages Uploader Button or in the “Request for Images” email
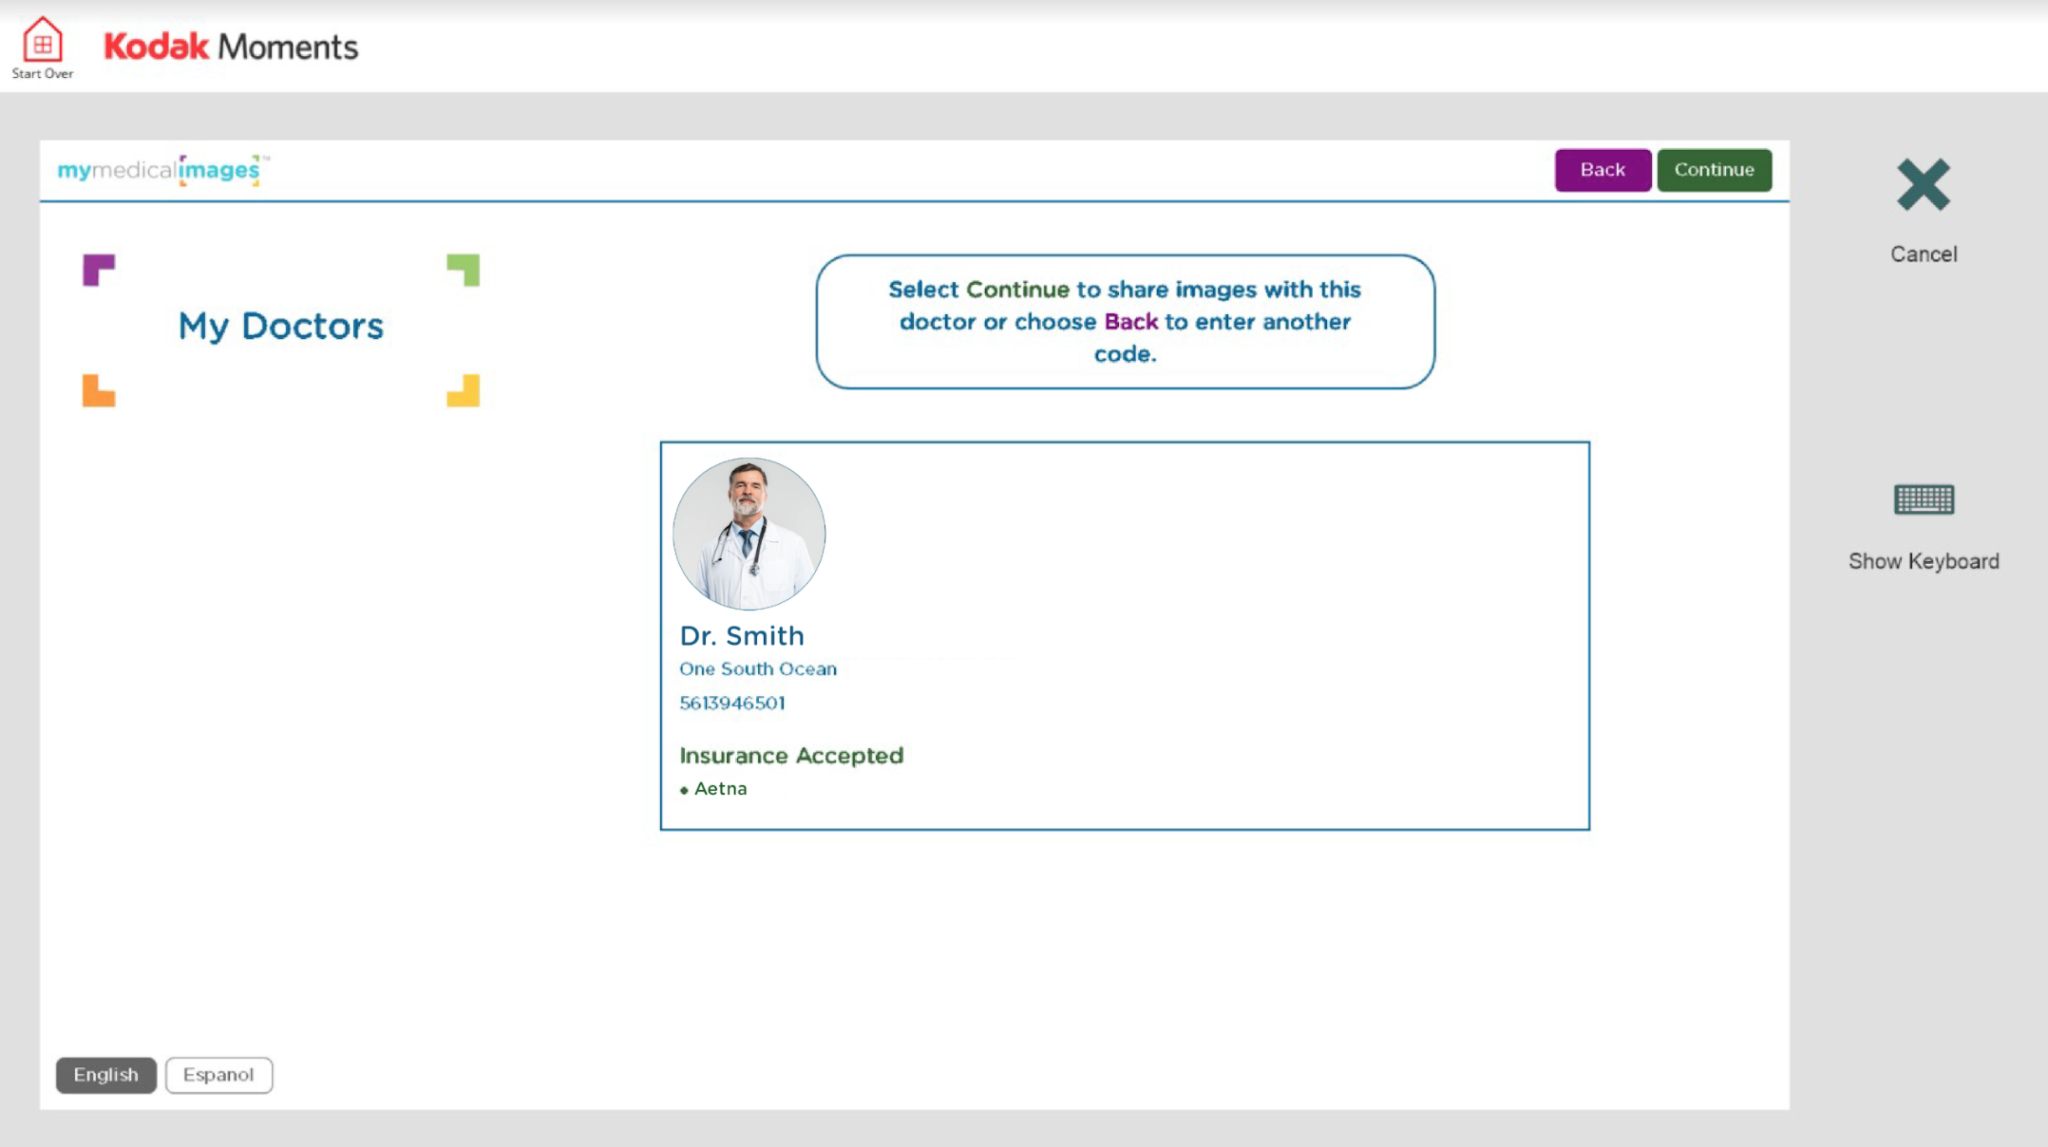
Step 7: Confirm the doctor selected is correct and tap “Continue”.
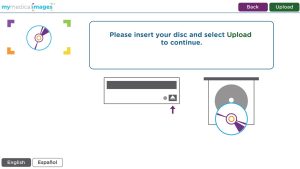
Step 8: Tap “Upload” when ready to insert disc and to open disc tray.
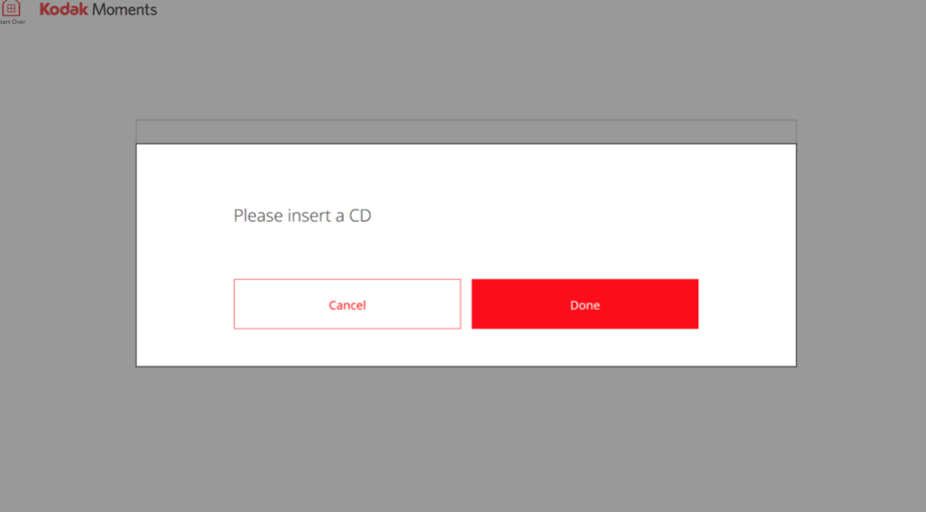
Step 9: Insert your CD into the kiosk and tap “Done”.
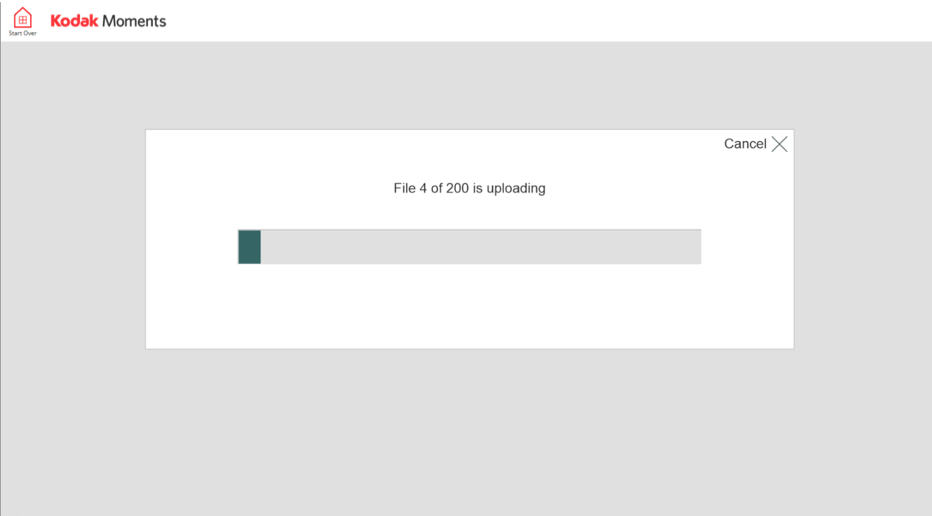
Step 10: Allow the kiosk to pull images from your disc.
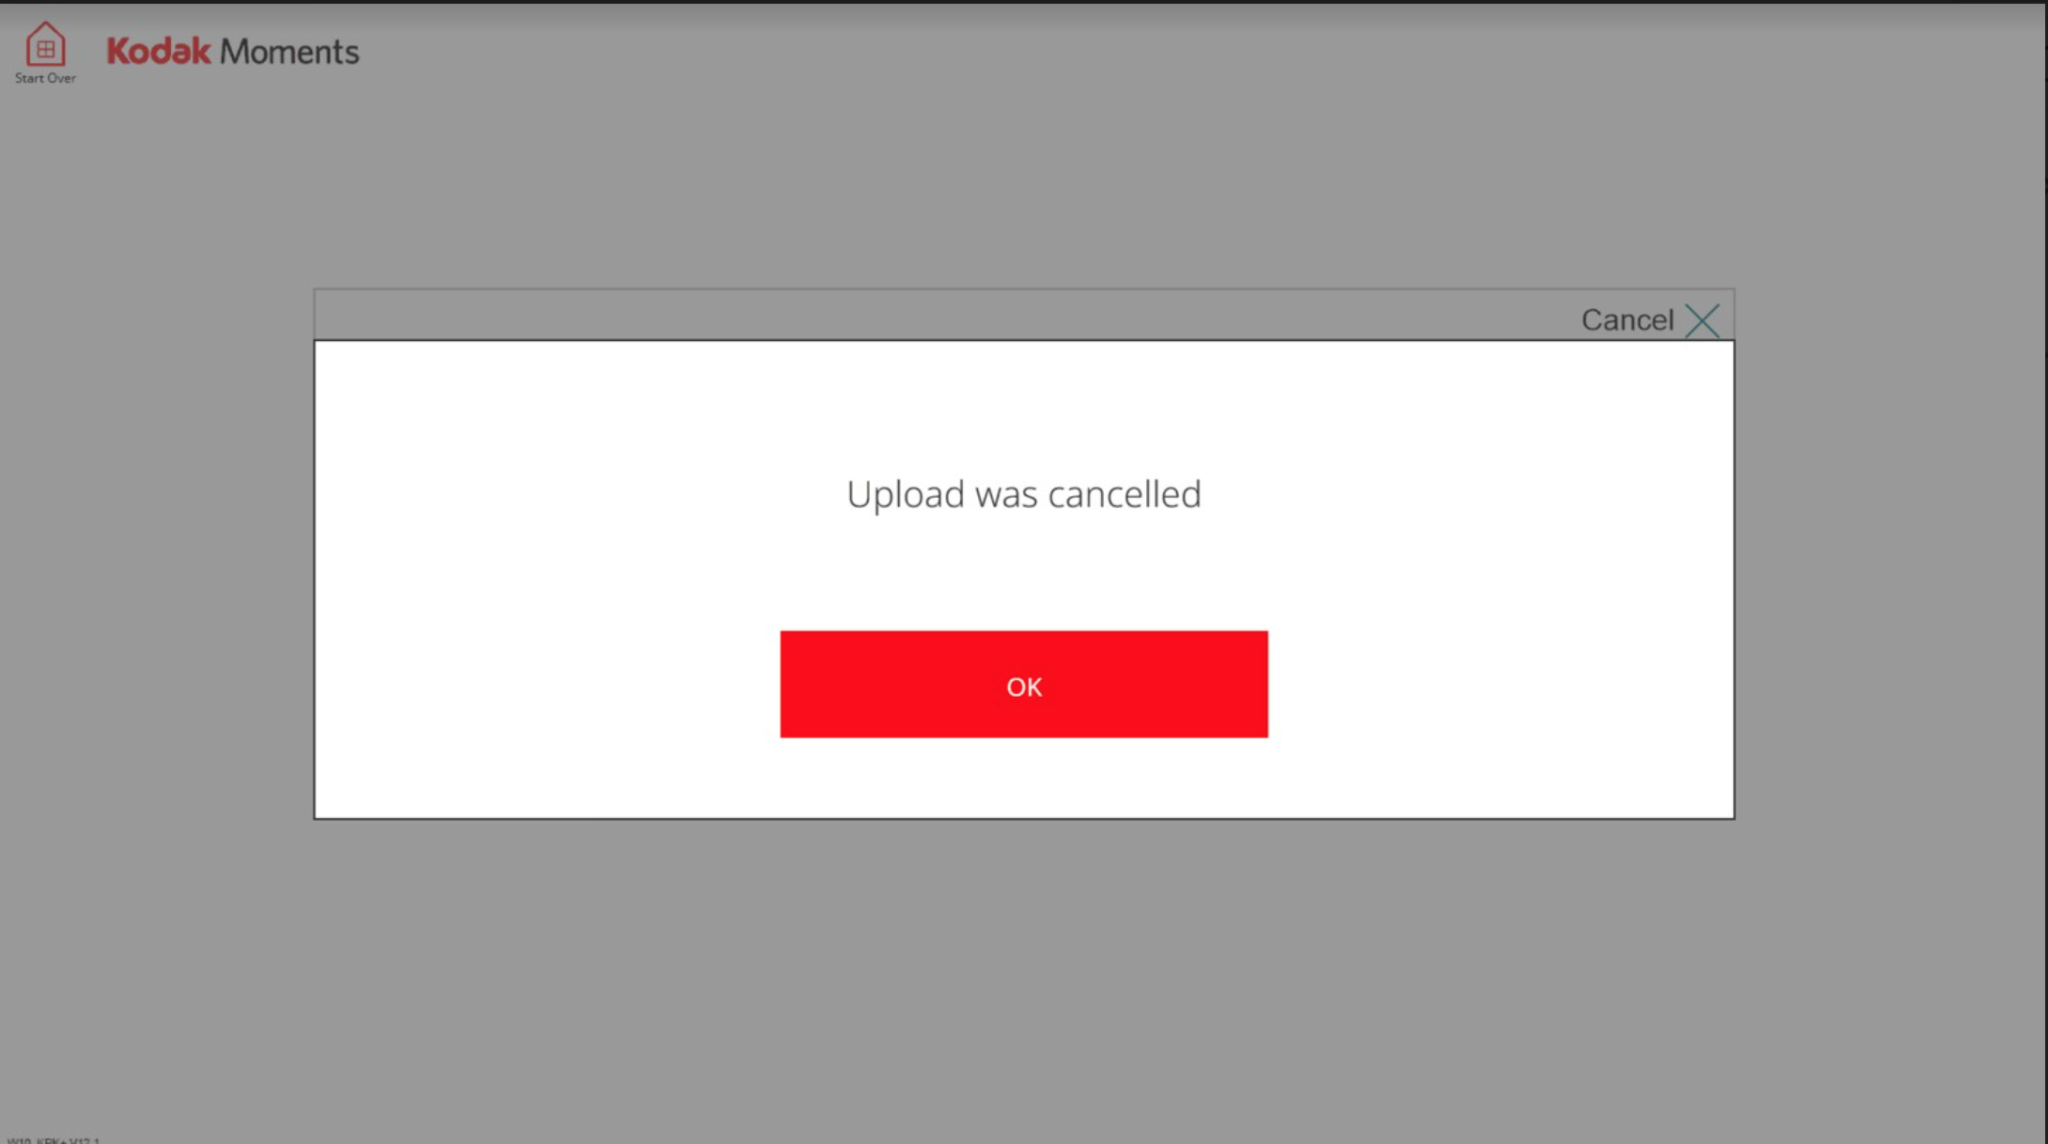
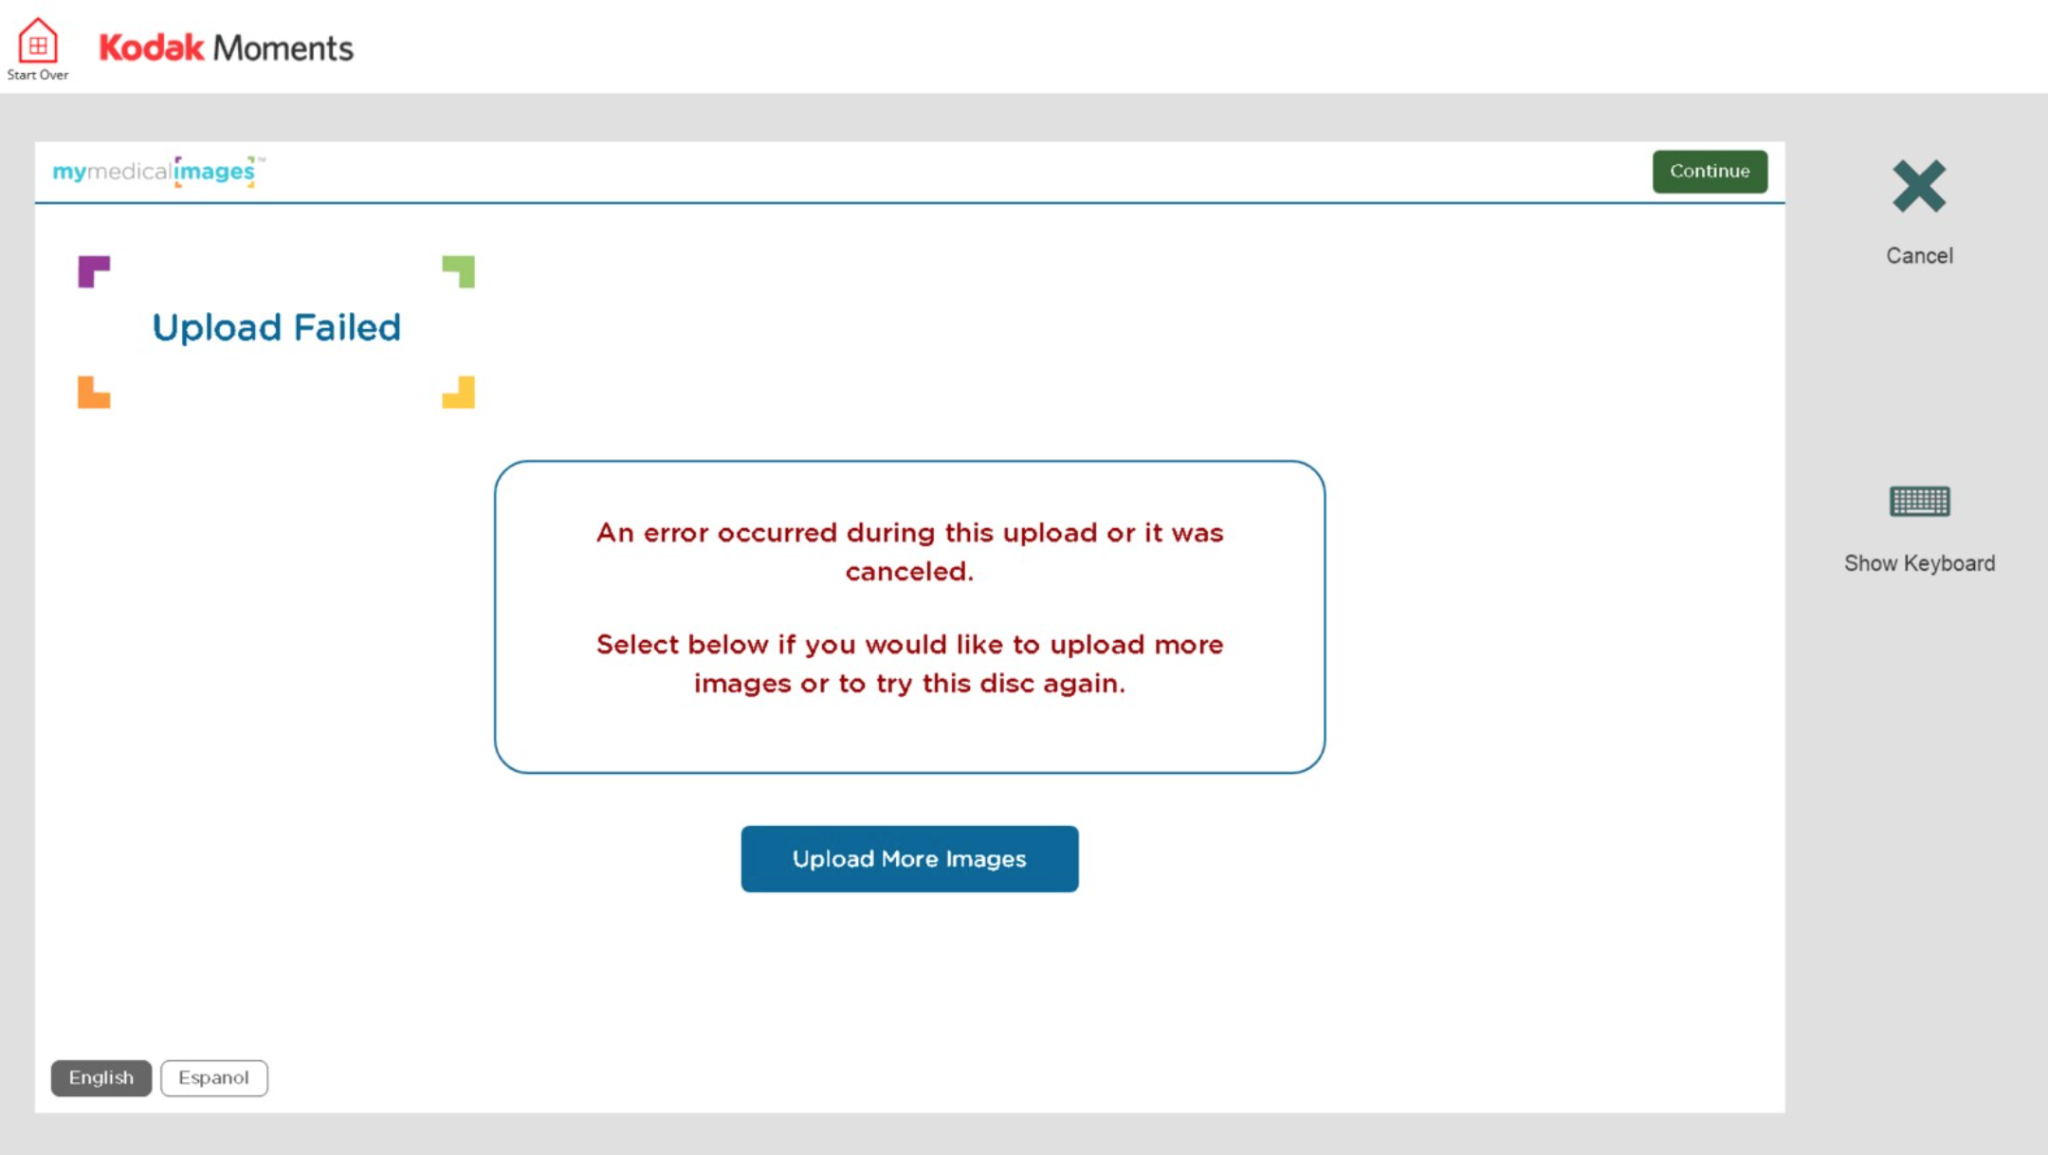
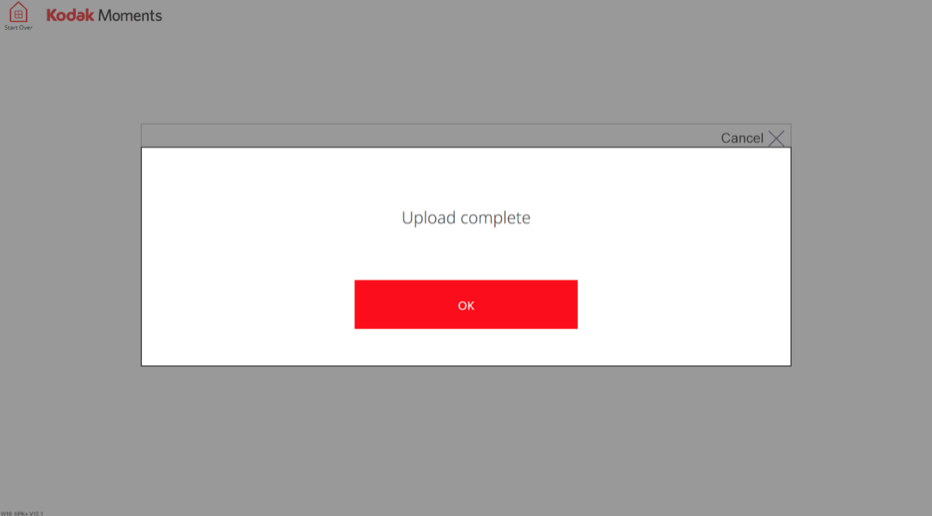
Note: If you hit cancel in the upload process, you will receive these error messages. Please choose to upload more images or cancel the upload process.
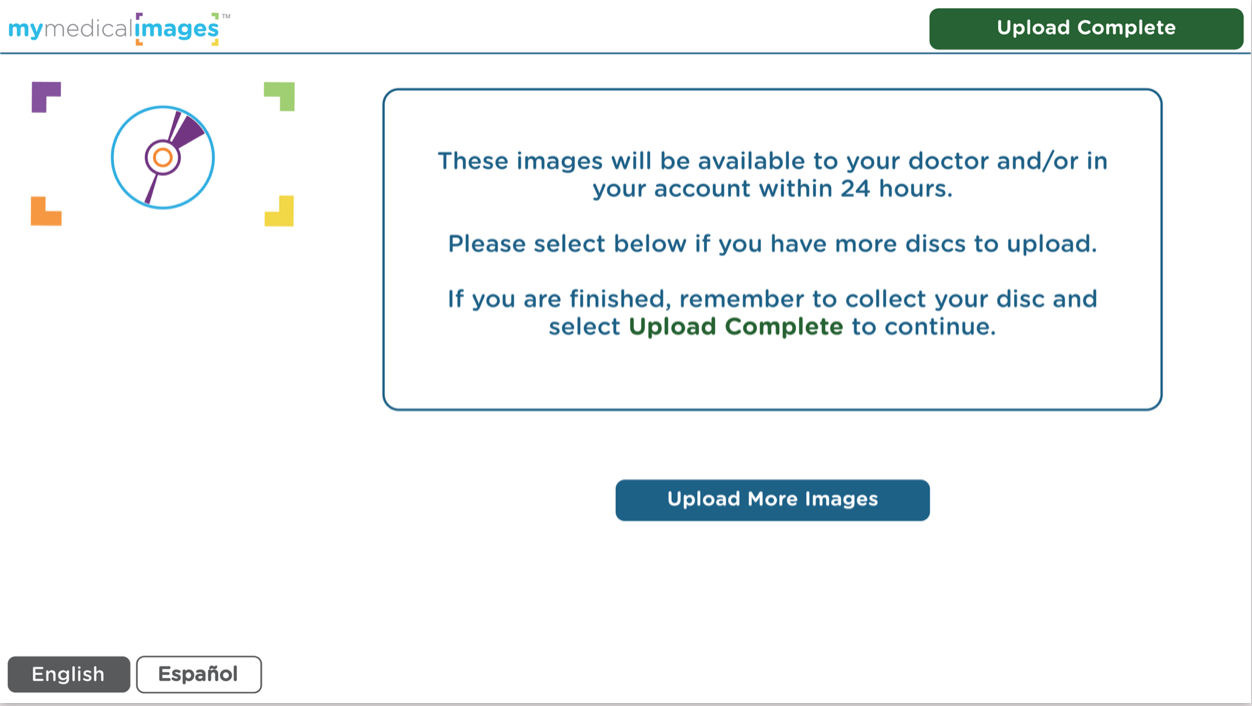
Step 11: After all images have been pulled, your screen will look like this.
Step 12: If you would like to upload more images please tap “Upload More Images” if not, tap “Upload Complete”
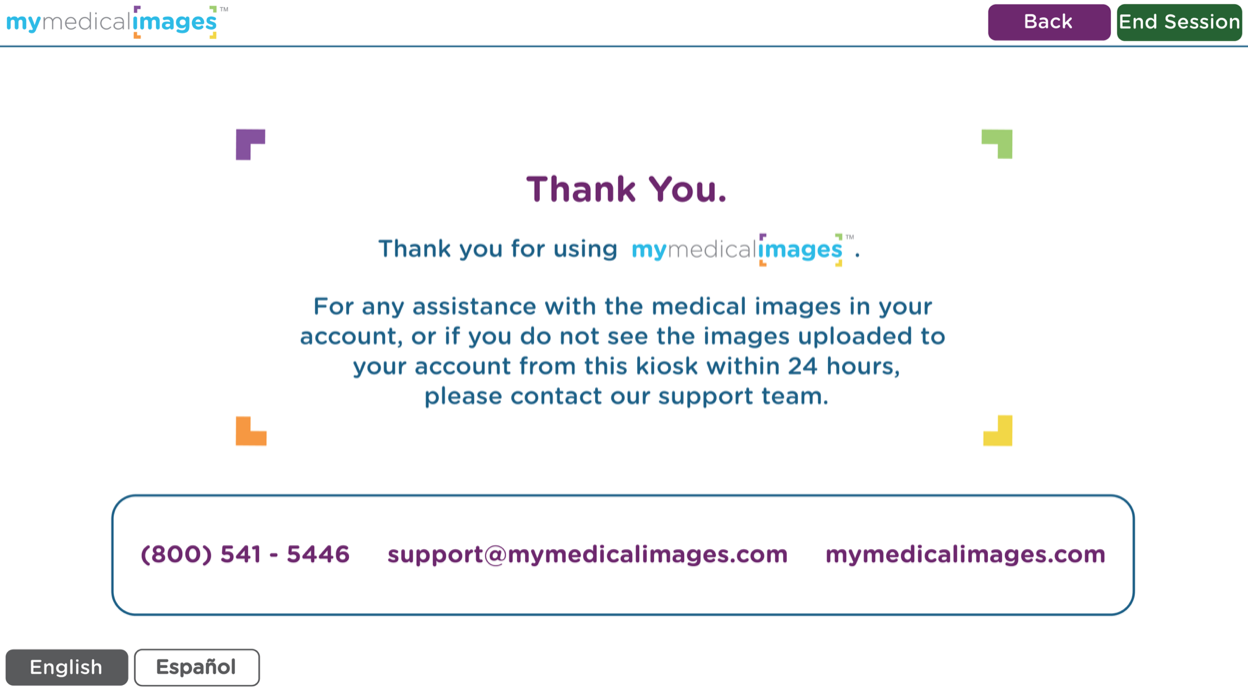
Step 13: Thank you! Your upload is complete. Please tap “End Session” and remember – don’t forget your disc!
Uploading Images – New Account
Step 1: Tap Touch to Start
Step 2: Accept the CVS photo kiosk terms of service and tap continue.
Step 3: Tap “I want a FREE Basic Account”
Step 4: Enter your information in the spaces provided, check the terms and conditions box and tap “Continue”
Step 5: Tap “Upload Images to My Account”
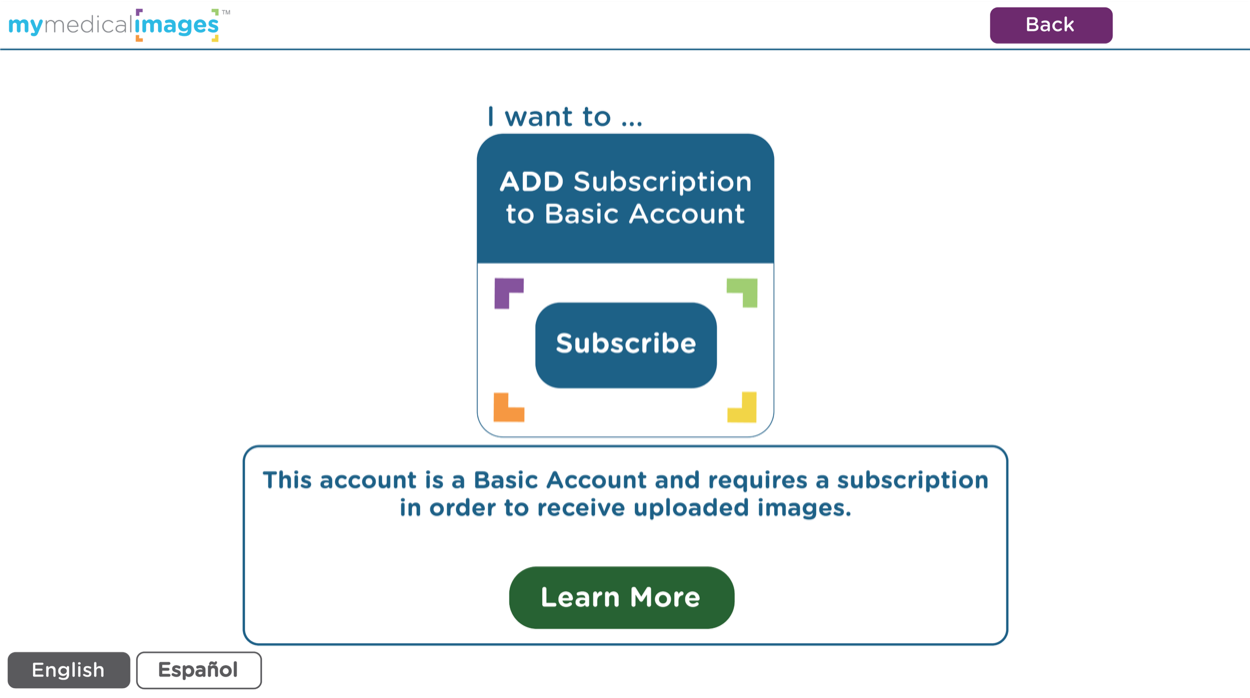
Step 6: Tap “Subscribe”
*Note* In order to upload images into your account you must have a mymedicalimages subscription. To learn about it’s benefits, tap “Learn More”
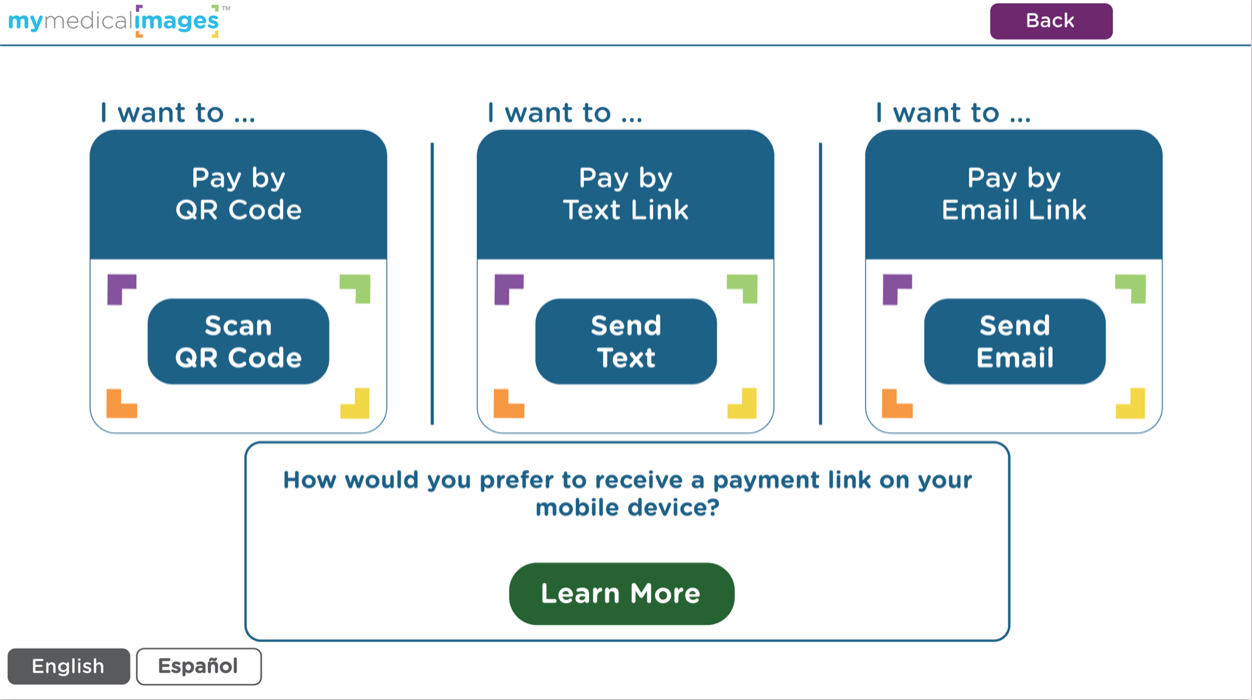
Step 7: Choose which prompt you would like to pay. Text Link, QR Code, or Email Link.
*Hint* If using QR code, hold your phone camera up to the QR code and tap the dropdown banner link on your phone. If you would like to use text or email, please follow the prompts sent to the Mobile number or email address attached to your account.
Step 8: After completing payment, tap “Upload” when ready to insert disc and to open disc tray.
Step 9: After completing payment, insert your CD into the kiosk and tap “Done”.
Step 10: Allow the kiosk to pull images from your disc.
Note: If you hit cancel in the upload process, you will receive these error messages. Please choose to upload more images or cancel the upload process.
Step 11: After all images have been pulled, your screen will look like this.
Step 12: If you would like to upload more images please tap “Upload More Images” if not, tap “Upload Complete”
Step 13: Thank you! Your upload is complete. Please tap “End Session” and remember – don’t forget your disc!
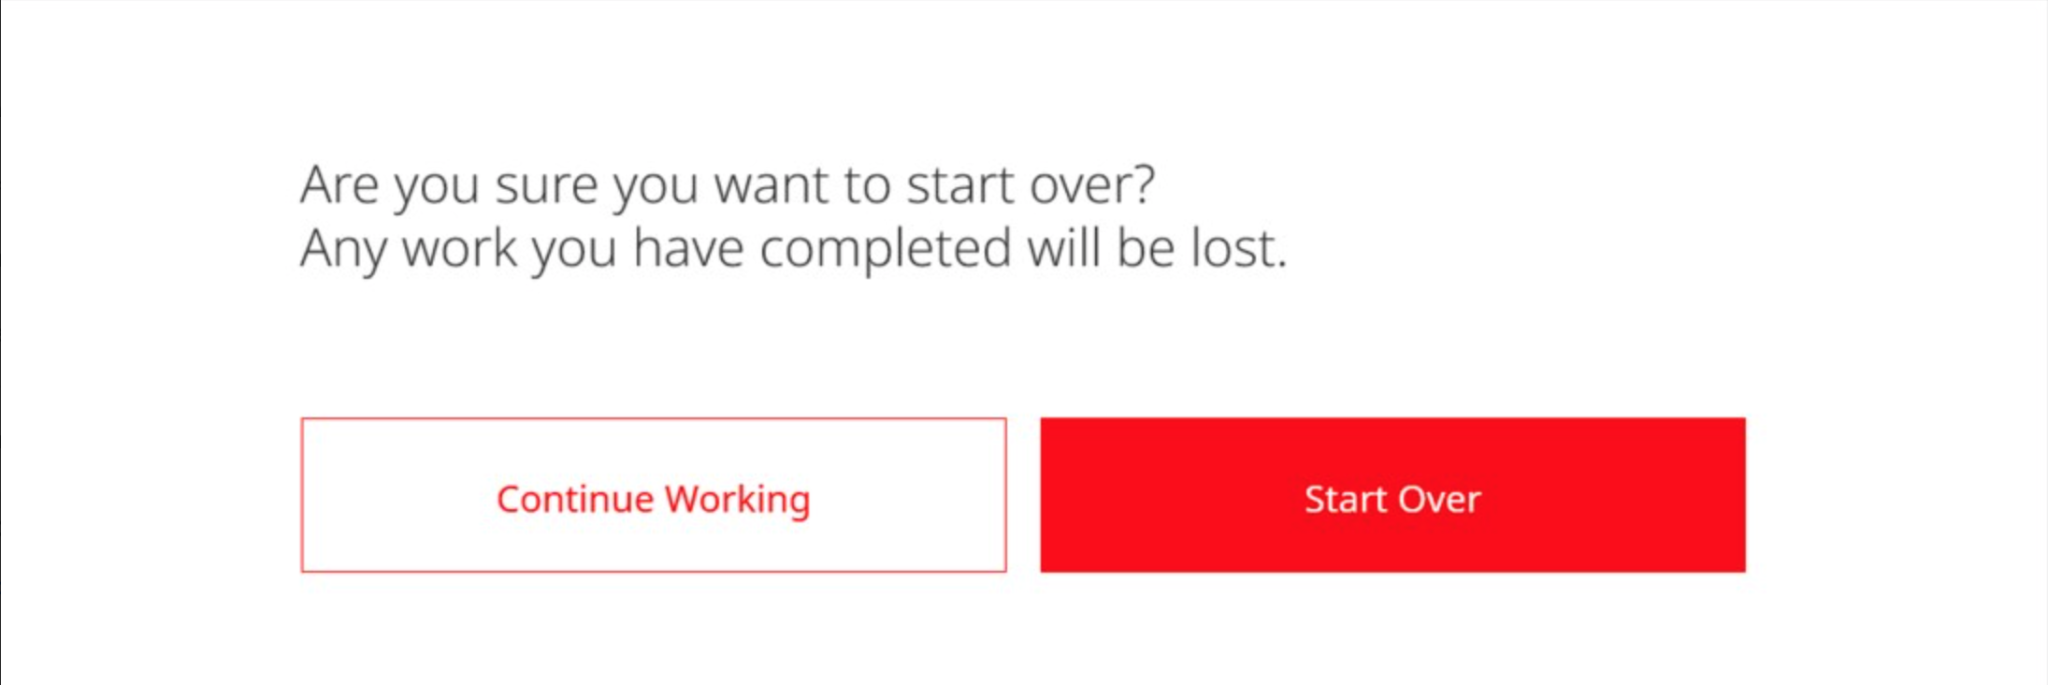
Note: If at any point you wish to exit the mymedicalimages upload process, simply click the ‘X’ located on the top right hand corner of the kiosk screen and press “Start Over”
If you have any questions or concerns, please do not hesitate to reach out to our customer support team at (800) 203-4771


